2019年5月29日星期三

VXDIAG Porsche Piwis3 Developer Mode shell config. update tips

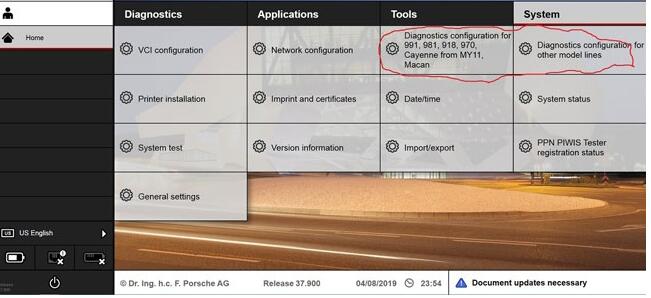
The Developer Mode in Porsche Piwis 3 is not available when you update the shell, coz you lose the menu diagnostics configuration to switch between regular and developer mode,
Problem solved if you copy the old file com.porsche.piwis.Shell.exe.config
Here is how to update the shell config. and get the diagnostic configuration boxes back, on the system tab.
After a successful update from 37.250.20 you will loose the two above mentioned boxes from the System tab.
If you did not loose them, then the [PIDT] diagnostic software did not update completely.
So it’s a good thing to loose it !
Go to C:\PiwisApps\Shel\ and carefuly edit with notepad   this file –> com.porsche.piwis.Shell.exe.config
after the update the PIDT section shows up in green, after U edit it it will be blue.
First picture shows, red underlined, 2 places, beginning and the end of the green section, what to remove.
On top [Line 568 on mine] U delete  these four symbols       !–<     on the bottom [line 603 on mine] U delete these 3 symbols   –>
Then U save the config file.
Restart the PC and your Diagnostic config box for 991,981,970 and Diagnostic config for other models RE-APPEAR.
rm996 has the solution how get the developer functionality back up and running, !!! PM him.
[Similar solution for the lost with the Update Wiring Diagrams ]
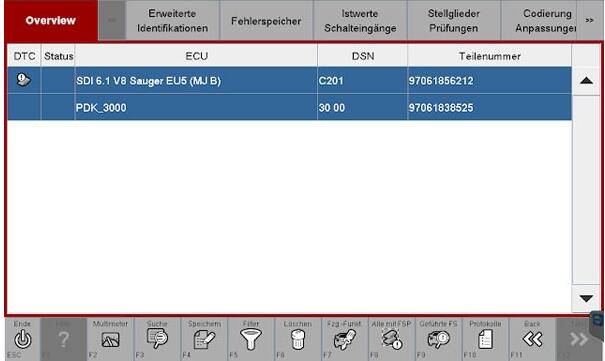
VXDIAG-Porsche-Piwis3-Developer-Mode-1
Another tip might help you also.
It’s how to enable Developer Mode for Piwis 3
Developer mode is a special Piwis program that allow a lot of advanced coding normally reserved only to Factory.
With this function you will have a tool that can do more than software of official Porsche Dealer.
For example, you can reprogram all ECUs completely offline.
How to use Piwis Developer Mode:
Install winrar and winhex on your computer.
-1-locate the file c:\program files\porsche\PIDT_P_MIG_DLSS3\pidt\plugins\de.dsa.pidt.datatype.jar and copy it on your desktop in order to modify it.
Open it with winrar,in the wirar windows locate the file
\de\dsa\pidt\datatypes\utils\Helper$1.class and drag it on your destop , delete it from the archive after the copy, keep the winrar window open.
Open Helper$1.class on your desktop with winhex and goto offset E81, replace 9A by A7 and save.
Drag back the save file on the winrar windows still open and click OK.Close winrar
Copy the new file de.dsa.pidt.datatype.jar you just made in
c:\program files\porsche\PIDT_P_MIG_DLSS3\pidt\plugins, overwrite it.
copy the file aftersales.sig on your desktop and rename it development.sig.Copy this file back in the folder
Do exactly the same method given above with the folder c:\program files\porsche\PIDT_P_MIG_DLSS3 with its own files.
To transform it in developer :
Settings
Diagnostic configuration
981-991, mode, operating mode, E= development, P= production, V= aftersales ( regular piwis)
Other models line, mode, operating mode, E= development, P= production, V= aftersales ( regular piwis)
This method to switch between regular and developer works only with my backup and will not work anymore after
an update.
Images:
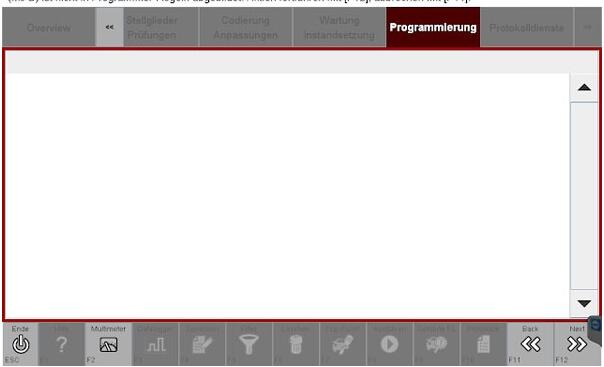
VXDIAG-Porsche-Piwis3-Developer-Mode-2
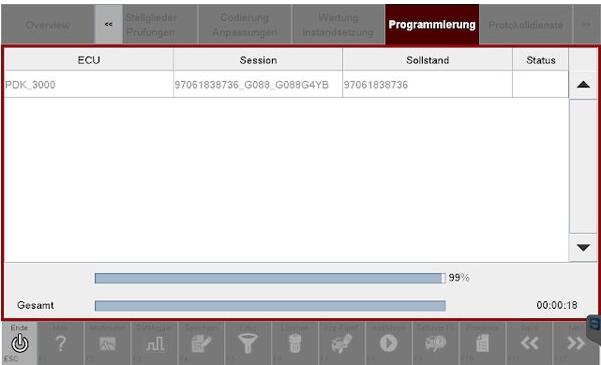
VXDIAG-Porsche-Piwis3-Developer-Mode-3
VXDIAG-Porsche-Piwis3-Developer-Mode-4
Maybe this helps Folks some.
2019年5月2日星期四

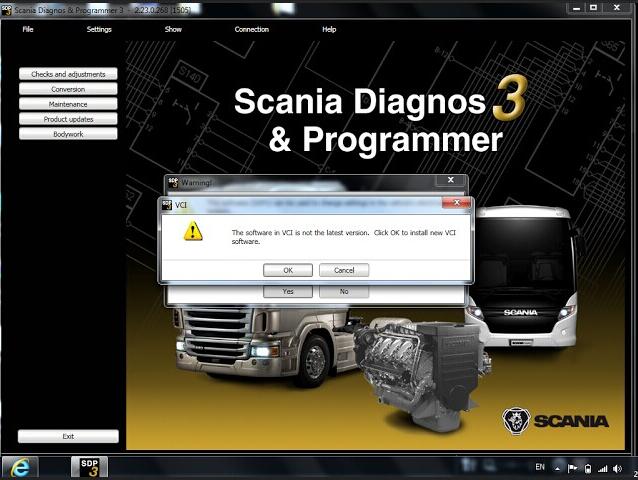
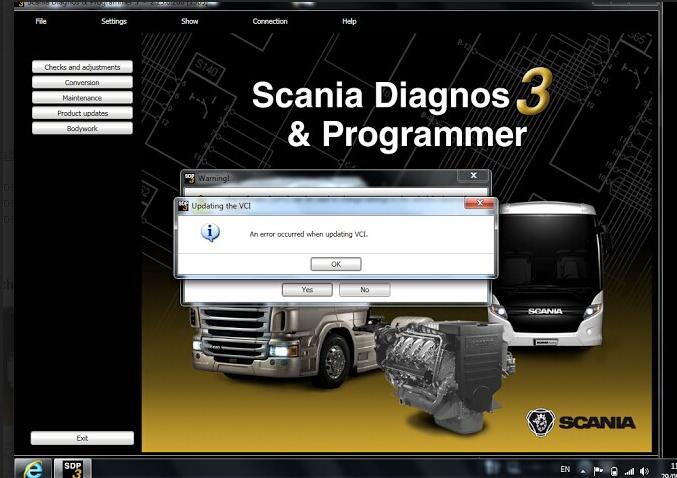
(Solved) Scania SDP3 V2.39 error “VCI is not the latest version”

“The software in VCI is not the latest version. Click OK to install new VCI software”
Scania-VCI2-SDP3-error-1
Press ok and get error “An error occurred when updating VCI”.
Scania-VCI2-SDP3-error-2
Then “VCI2 Firmware Update: Updating VCI2 firmware with error code 1”.
Scania-VCI2-SDP3-error-3
Solution:
VCI3 Chinese clone that does not support VCI update, delete the contents of the folder “vcifrimware” in scania/sdp3 directory” .
Here  you go for SDP3 V2.39 free downlaod link:
https://mega.nz/#!zJREQQRS!1Tye4NRNiTMBY5xteTGTkuap1Md8Le1dQGrfu3P2GFk
Works on WIN7 WIN10
English, German, Spanish, French, Japanese, Dutch, Persian, Polish,
Portuguese, Swedish, Norwegian, Suomi, Turkish, Italian, Czech, Russian,
Chinese.
Install and active through Teamviewer by www.obd2tool.com engineer.

2019年3月16日星期六

MB SD C4 with EVG7 manual incl. FAQ , setup etc

What you can read in this post:
1.Solution to EVG7 Blue Screen working with MB SD Connect C4
2.Battery and hard disk disassembly and installation
3.Find out and use the on-screen keyboard.
4.The method to use EVG7 U disk.
Here we go one by one
Part 1: Solution to EVG7 Blue Screen working with SD Connect C4
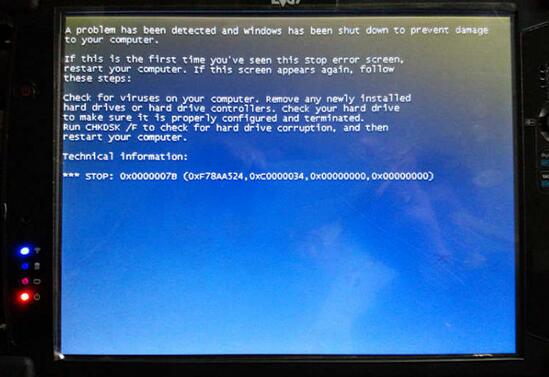
Look this image of EVG7 Blue Screen:
MB-SD-C4-with-EVG7-1
Solution:
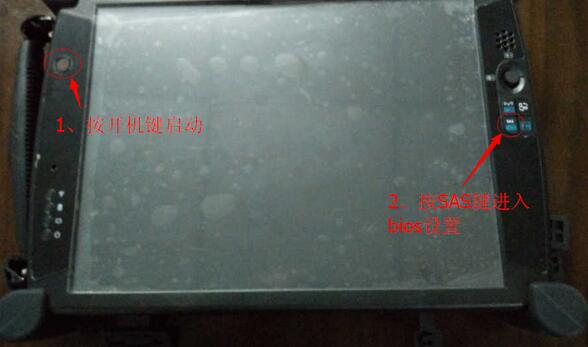
1.Press the “On” button to turn on machine. Then press “SAS” button to enter bios settings.
MB-SD-C4-with-EVG7-2
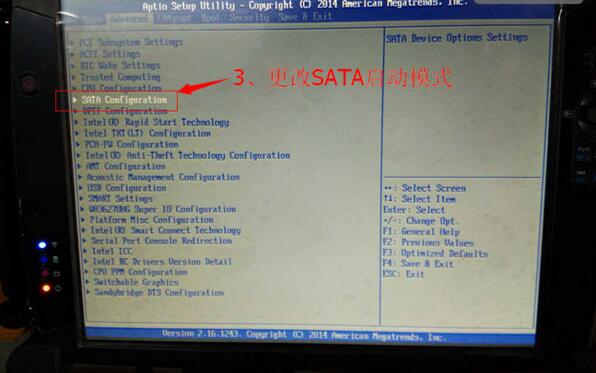
2.Change Sata startup mode.
MB-SD-C4-with-EVG7-3
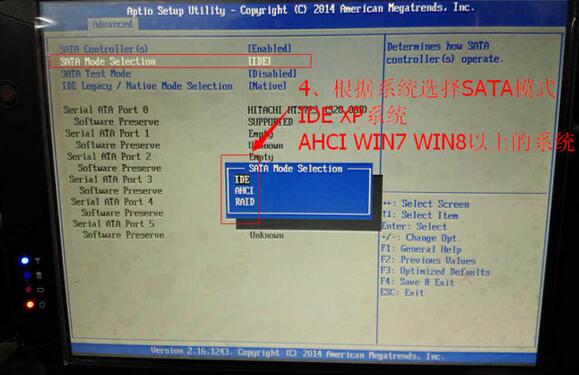
3.IDE: for Windows XP
AHCHI: for WIN7, 8 etc.
MB-SD-C4-with-EVG7-4
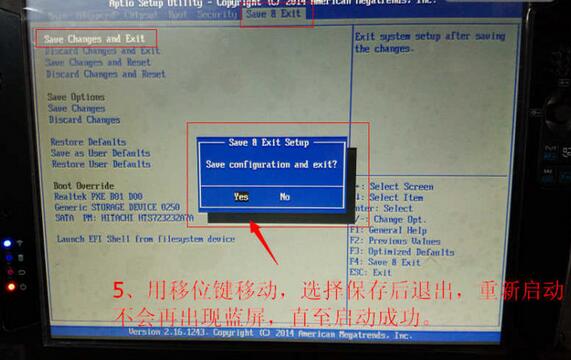
4.Use the shift key to save and exit.
Restart the EVG7 and the Blue screen will disappear.
MB-SD-C4-with-EVG7-5
Part 2: Battery and hard disk disassembly and installation
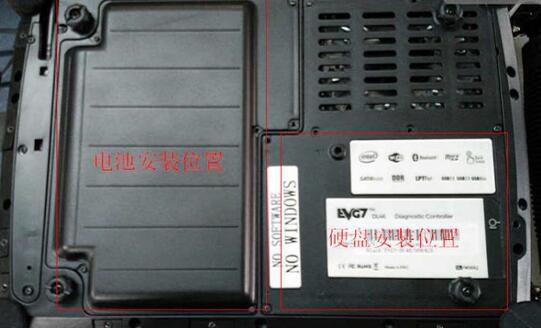
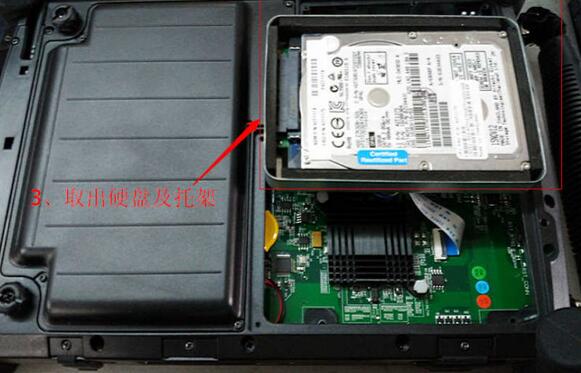
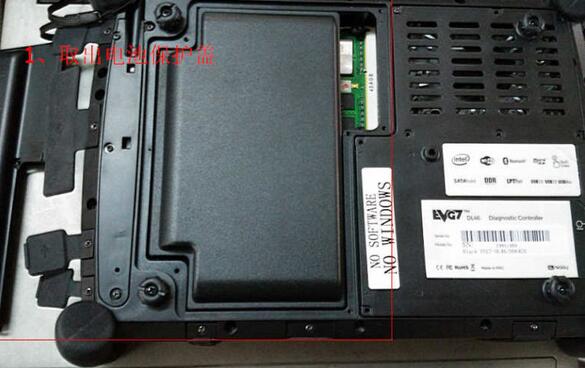
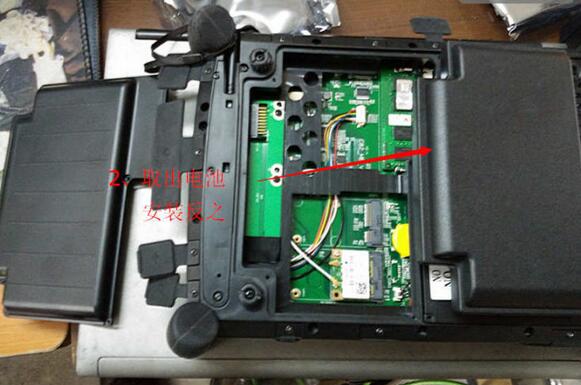
This upper left corner is the position of battery, the lower right corner is the position of the hard disk. Before installing, please remove all the screws on the back cover.
MB-SD-C4-with-EVG7-6
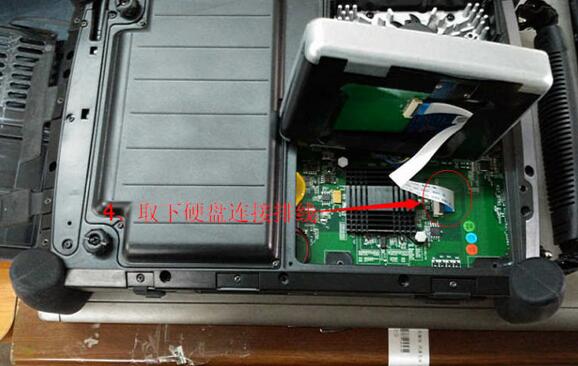
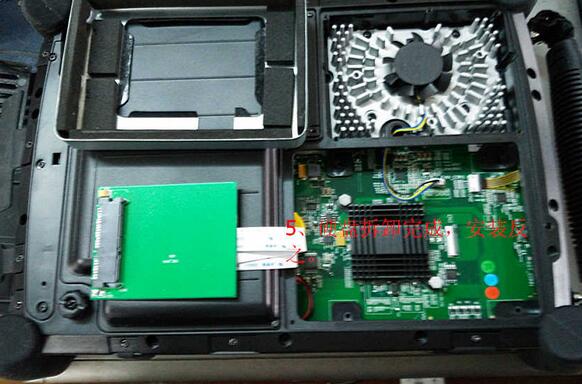
1.Hard disk disassembly and installation
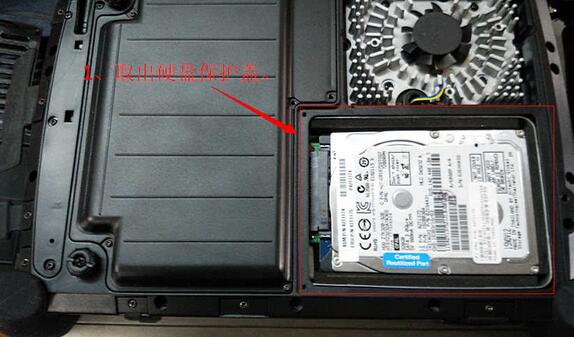
Open the cover of hard disk.
MB-SD-C4-with-EVG7-7
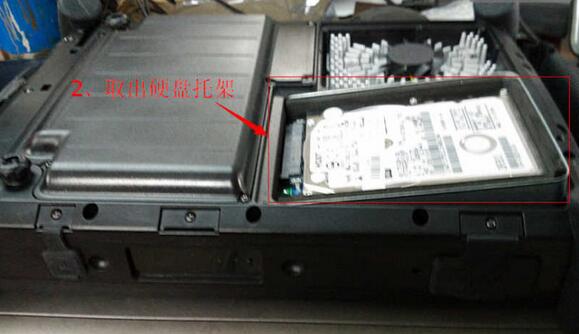
Remove the hard drive bay
MB-SD-C4-with-EVG7-8
Take out the hard disk and the bay.
MB-SD-C4-with-EVG7-9
Remove the hard drive connection cable
MB-SD-C4-with-EVG7-10
Done.
Now you know how to install back, right?
MB-SD-C4-with-EVG7-11
2.Battery disassembly and installation.
Disassembly:
Open the cover of the battery.
Take out the battery.
Installation:
Put back the battery and close the cover.
MB-SD-C4-with-EVG7-12
MB-SD-C4-with-EVG7-13
Part 3: Find out and use the on-screen keyboard.
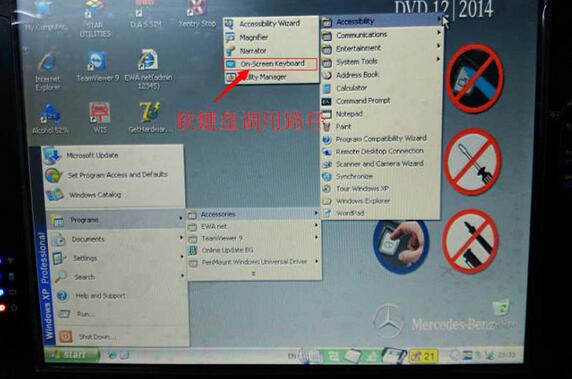
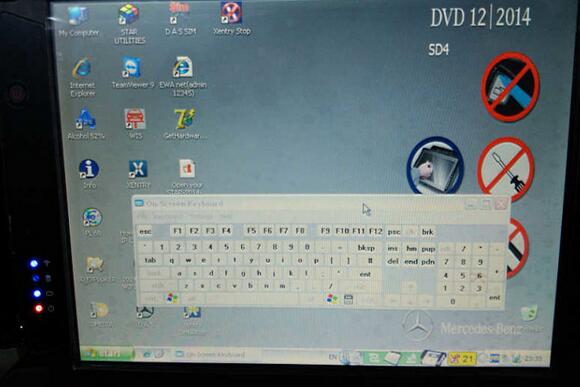
Start – Programs – Accessories – Accessibility -On-screen keyboard.
MB-SD-C4-with-EVG7-14
MB-SD-C4-with-EVG7-15
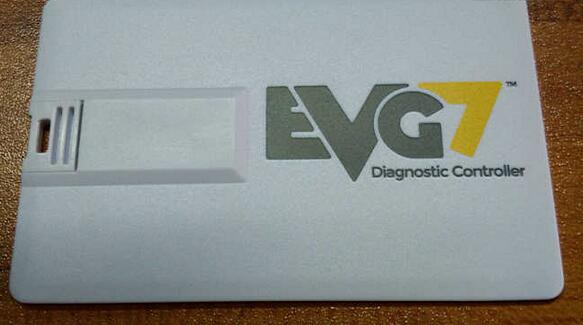
Part 4: The method to use EVG7 U disk.
MB-SD-C4-with-EVG7-16
MB-SD-C4-with-EVG7-17
MB-SD-C4-with-EVG7-18
Remarks: There are stylus installation drivers and EVG7 hardware drivers in the mobile U disk. The drivers need to be installed manually
www.obd2tool.com

2018年11月26日星期一

How to Update Autel MD808 Scanner 4-system to Pro Full System

Question:
Hello, I recently bought the Autel MD808 scanner but  I was mistaken, it was not the MD808 Pro it’s the MD808 for 4 systems only, can you share a device account to try to update mine, if it works out I only paid for the password , registration and serial number, or can they suggest that you accept it? Thank you.
Solution from OBD2TOOL.com:
Yes. Autel Maxidiag MD808 4 system is possible to be updated to MD808 Pro full system.
If you bought the device from us , you need to compensate the price difference of 4-system and pro version (US$14) and provide your scanner Serial Number to run an upgrade.
If you didn’t buy the device from us, you need pay more price difference (US$30) and provide S/N as well. We can activate the update service for you.

2018年9月7日星期五

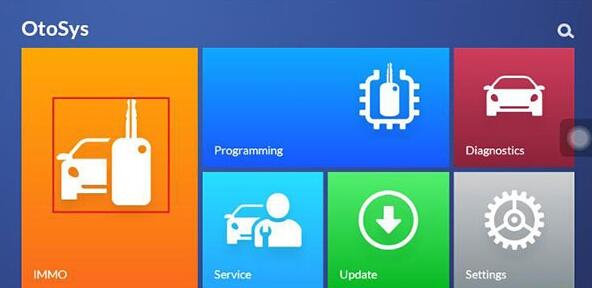
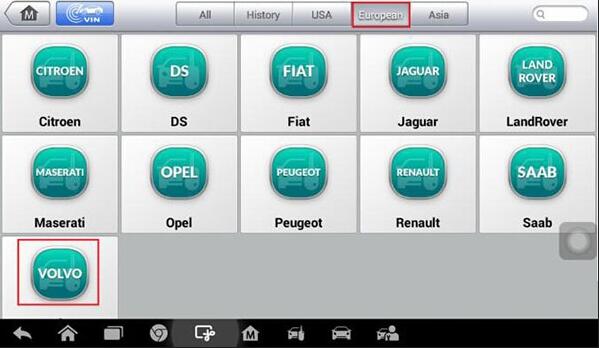
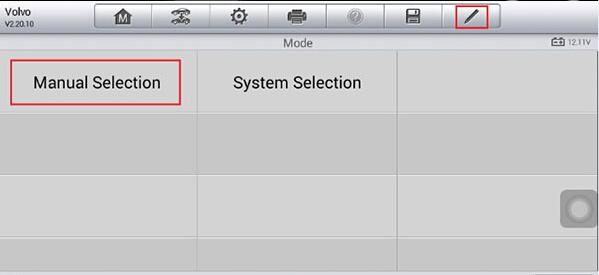
AURO OtoSys IM100 Volvo 2010-2016 Key Learning Confirmed!


AURO OtoSys IM100 is verified to work with VOLVO immobilizer from the year 2010 to 2016.
It’s second to Lonsdor K518ISE universal key programming tool that support VOLVO.
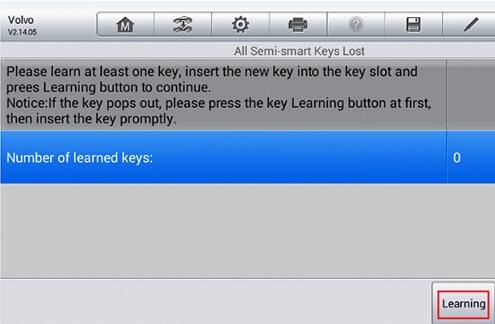
Step 1: learn keys
AURO Otosys im100 tested with Volvo immo…
14-1 14-2 14-3 14-4
14-5 14-6
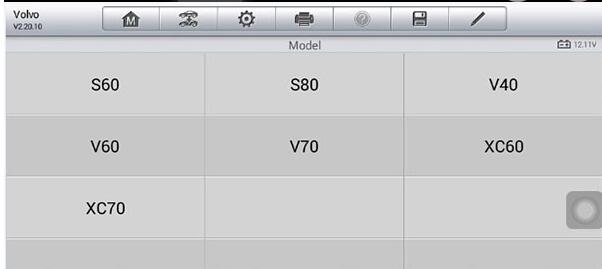
Otosys IM100 Volvo car list:
Volvo S60, S80, V40, V60, V70, XC60, XC70
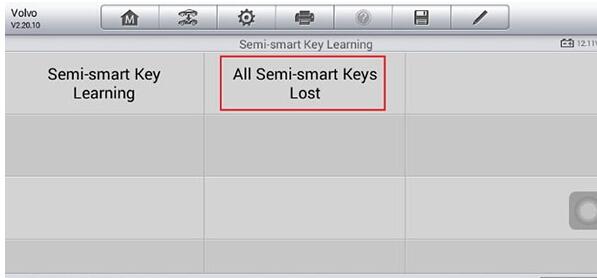
semi-smart keys 2010-2016
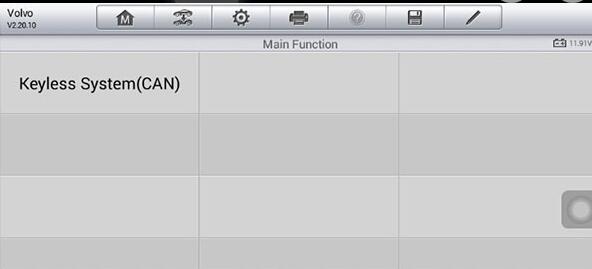
Keyless CAN system
Auro IM100 Auto Key Programmer begins to program new semi-smartkeys to Volvo when all keys are lost
14-7
14-8
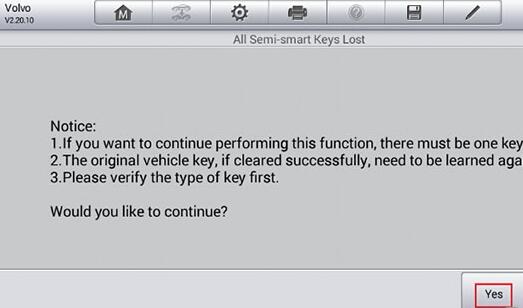
If you want to continue to performing this function, there must be one key!
The original key, if cleared successfully, needs to be learned again
Please verify the type of the key first
Ignition off
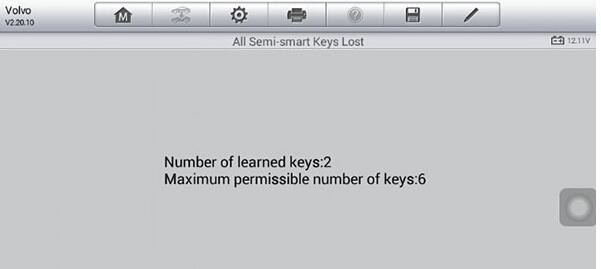
Learned keys: 2
14-9
Step 2: decrypt the immo & clear all keys
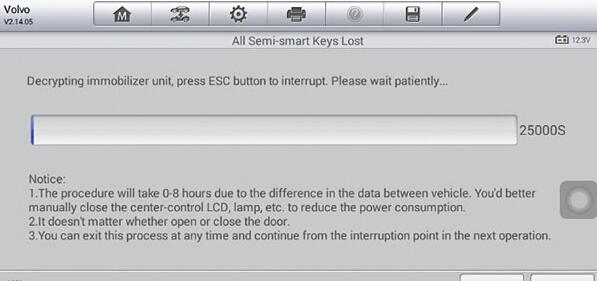
The immobilizer unit is to be decrypted, which may last a few hours.
Please make sure that the ignition is turned off
You can exit this process at any time and continue from the interruption point in the next operation
Decrypting the immobilizer unit…
14-10
The procedure will take 0-8 hours due to the difference between vehicles.
You’d better manually close the center-control LCD, lamp, etc. Toreduce the power consumption
It doesn’t matter whether the door is opened or closed
You can exit this process at any time and continue from the interruption point in the next operation
14-11
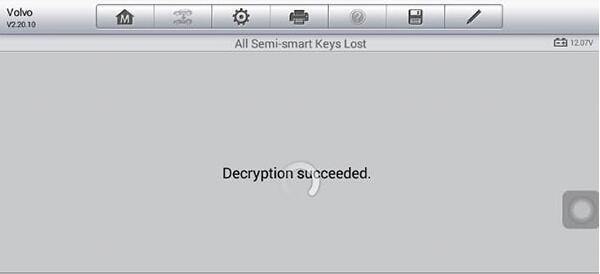
Decrytion success
14-12
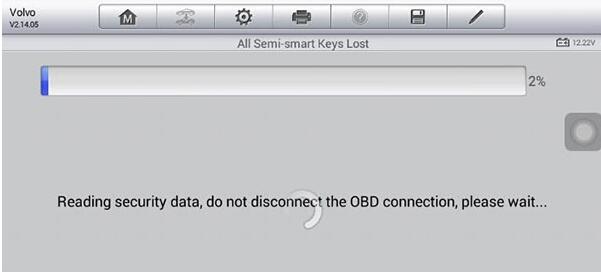
Otosys im100 is reading security data
Don’t disconnect the OBD connection
14-13
Copy CEM security data successfully
14-14
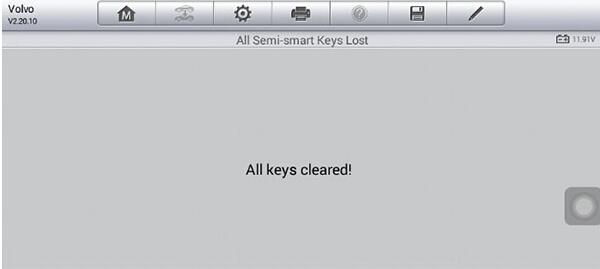
All key cleared! Learned keys: 0
14-15 14-16
Step 3: learn keys
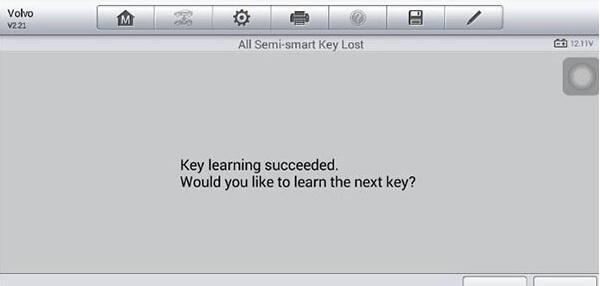
Key learning success
14-17
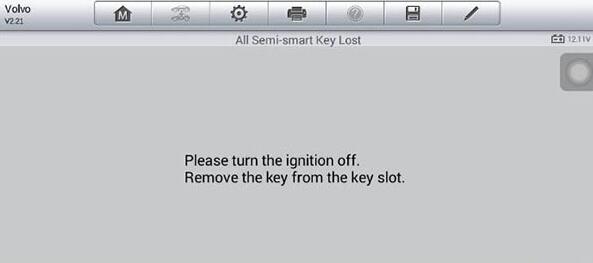
Ignition off
Remove the key from the key slot
14-18
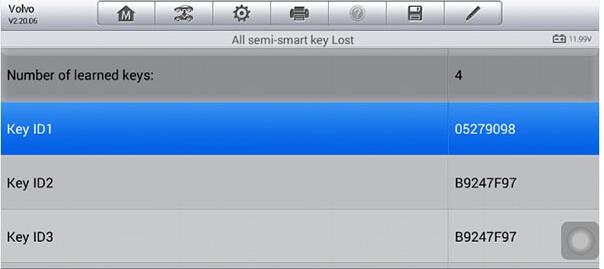
Learned keys: 4
14-19
Job’s done!
Credits to all off obd2tool.com working  for the IM100 test

http://youobd88.seesaa.net/article/461539554.html?1536327042

2017年9月3日星期日

Autel MaxiSys MS906 Auto Diagnostic Tool What Good User Feedback

I am going to invest in some scan tools and finally came across Autel MaxiSys MS906 automotive diagnostic Scan Tool online recently.
Before buying it, I haven’t heard much about this model but I know another shop owner nearby that has the Autel DS708 scan tool, he has nothing but good things to say about it.
According to the product description, MS906 is a better replacement of DS708. So you know, after much research, I took the plunge and bought it from www.youobd2.com within a promotion.
22-1
Why I need a professional diagnostic tool?
I’m a small auto repair shop owner, most of my customers have cars less than 10 years old.
So I needed a scan tool that can perform every aspect of auto repair, no matter what difficult my customer has.
From item page description, it looked like that MS906 Scanner could do the job.
When The Delivery Arrived?
I received the package 5 days after order, it was well wrapped but looked a little beat up from the many miles travel to get to me. Once I got it opened, I was impressed by the hefty, black plastic carrying case.
22-2
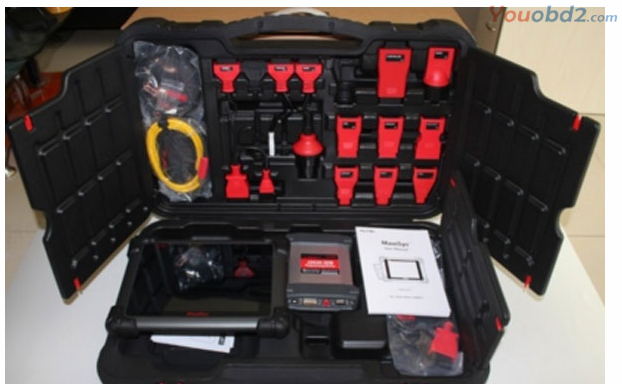
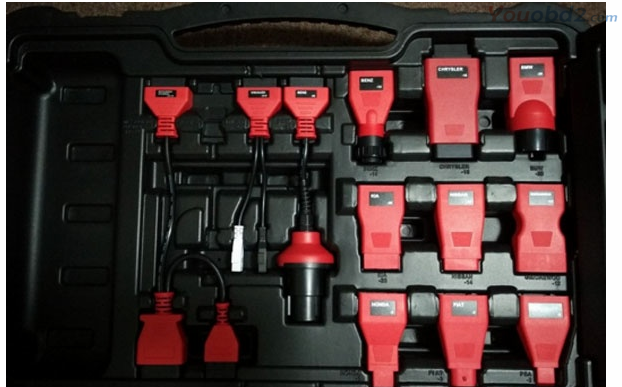
There are over a dozen make-specific connectors clipped into the lid (quite ingenious, actually, to use that otherwise empty space) as well as 3 books(User Manual, Quick reference guide, package list) and the cable in the bottom. The MS906 Autel diagnostic scanner was strapped in with a Velcro strap, protecting it from being damaged not only during shipping but in everyday use as well.
22-3
First Time Using Autel MS906
Being that the Autel MaxiSYS MS906 was expected do everything as the dealer-specific scanners, I decided to check out a customer’s engine light on their Ford Escape.
Like other professional scan tool, you have to connect the cable just like a computer cable with those little screws before use it, I plugged the scan tool in then power up the MS906.
I pressed the button and the screen lit up. It was only a few seconds until the main screen was displayed, and it really didn’t take long at all to figure out how to check the code. I scrolled through to the Ford button, pressed it, and pressed the “EOBD” or engine light icon. It literally walks you through the process to read the codes, and I found out the Escape needed an upstream oxygen sensor.
Out of curiosity, while I was checking the scanner out, I looked at the MaxiFix tab and was astonished to see that there was diagnostic and repair information for virtually every make and model out there. Just because I was curious, I looked up the upstream oxygen sensor procedure for my customer’s Ford Escape, and it looks to be correct.
Definitely, this information will come in handy.
22-4
This is really a Good Stuff
The Autel MaxiSys MS906 scanner has so many features that some are bound to be extremely useful.
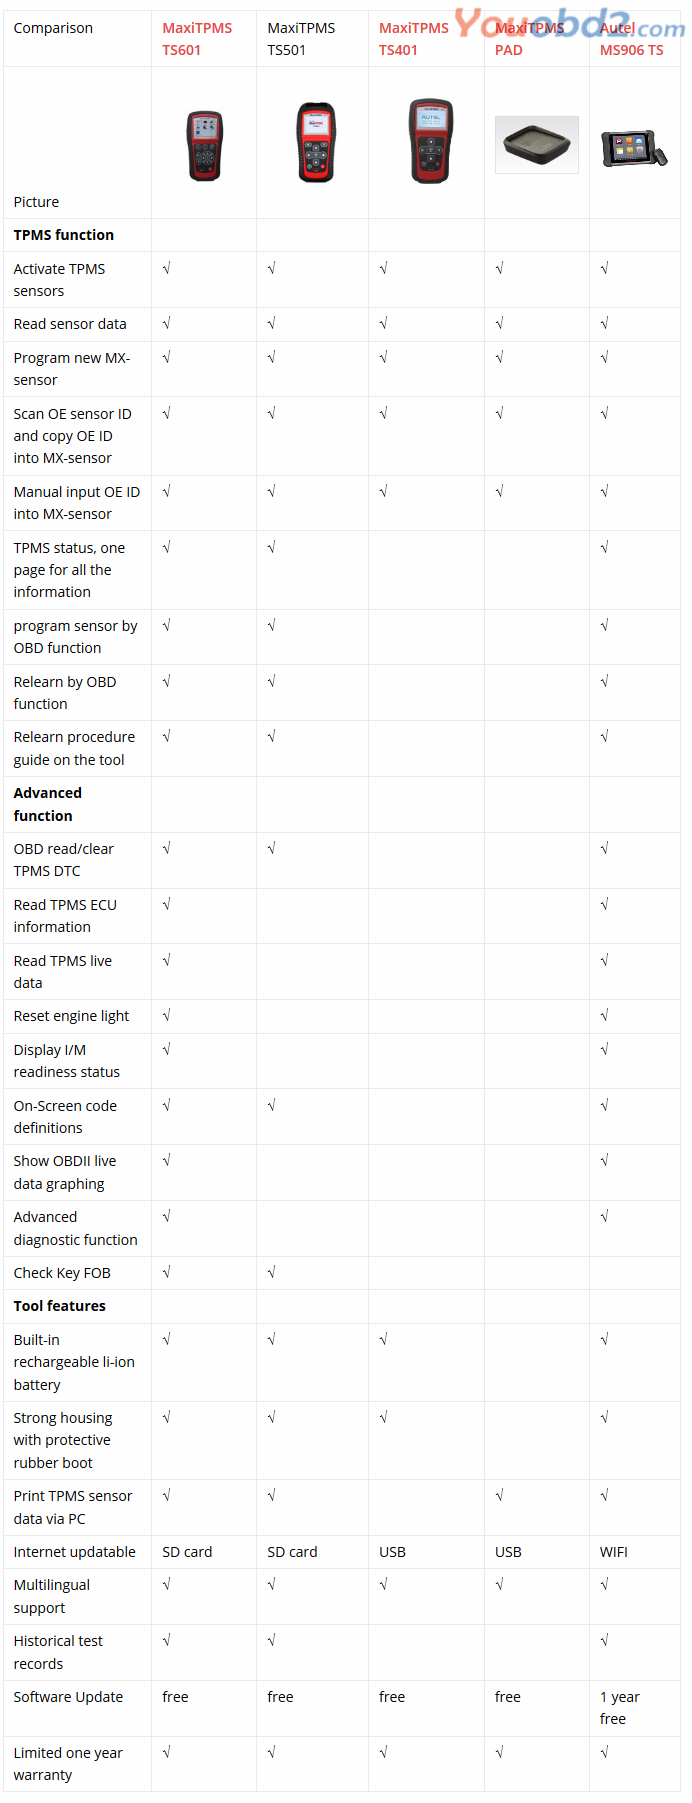
It has Smart AutoVIN which will detect the VIN number number from your car’s ECU most of the time. If it can’t recognize it, you can manually enter it easily. It can perform functions most shop owners farm out to the dealership like key programming and ECU programming, and it’s even capable of programming tire pressure monitor sensors if you buy the adapter with it.
Like I said before, it’s intuitive for basic functions like checking codes and has a massive 8-inch color touch screen. You’ll need to connect it to Wifi, but once you do you have access to online resources, remote support, and updates. Updates come free for a year for the MS906 according to the website but I haven’t tried it yet.
Great For the Pros
To wrap things up, I’d give the Autel MaxiSYS technician thumbs up. It performs great for everything I’ve needed it for and should for the foreseeable future. If you’re a home mechanic, save your money and get something cheaper as this one is way overkill. If you’re a small to medium-sized workshop, you’ll be satisfied with Autel MaxiSys MS906 Scanner.

2017年9月2日星期六

2017年8月27日星期日

SuperOBD SKP-900 V5.0 Hand-Held OBD2 Auto Key Programmer - US$365.00

SuperOBD SKP-900 V5.0 Hand-Held OBD2 Auto Key Programmer - US$365.00

ICOM A2+B+C for BMW with 2017.07 Software Plus EVG7 Diagnostic Controller Tablet PC - US$998.00

ICOM A2+B+C for BMW with 2017.07 Software Plus EVG7 Diagnostic Controller Tablet PC - US$998.00

Mb Star C3 Plus Dell D630 Laptop-for Benz Trucks & Cars) 2015.12 version - US$358.00

Mb Star C3 Plus Dell D630 Laptop-for Benz Trucks & Cars) 2015.12 version - US$358.00

Launch ICarScan Full Systems Diagnostic Tool Bluetooth Scanner for Android/IOS with 8 Free Software Update Online - US$158.00

Launch ICarScan Full Systems Diagnostic Tool Bluetooth Scanner for Android/IOS with 8 Free Software Update Online - US$158.00

Best Quality Ford VCM II Ford VCM2 Diagnostic Tool V101 - US$168.00

Best Quality Ford VCM II Ford VCM2 Diagnostic Tool V101 - US$168.00

GM Tech2 GM Scanner (CANdi & TIS) with TIS2000 Software Full Package without Carrying Case - US$258.00

GM Tech2 GM Scanner (CANdi & TIS) with TIS2000 Software Full Package without Carrying Case - US$258.00