2021年5月13日星期四

How to Solve MB SD C4 EWA Local Host Can’t be reached


Problem:

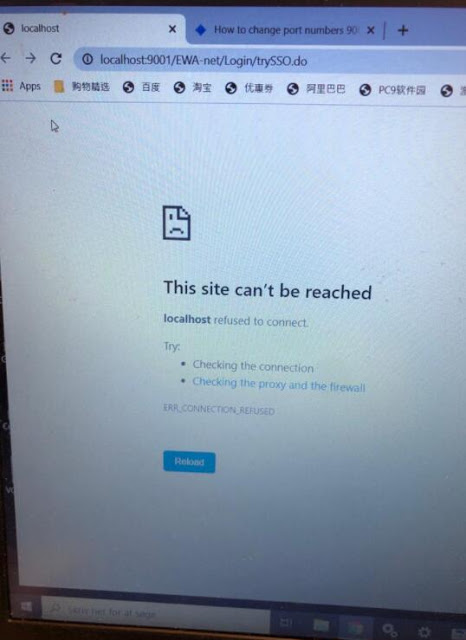
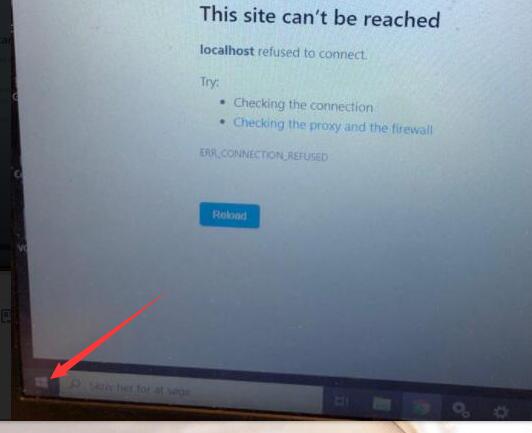
I tried to enter local host in MB SD Connect C4 EWS software, it failed me and reported error “This site cannot be reached”

mb-sd-c4-ews-This-site-cannot-be-reached-1

Solution:
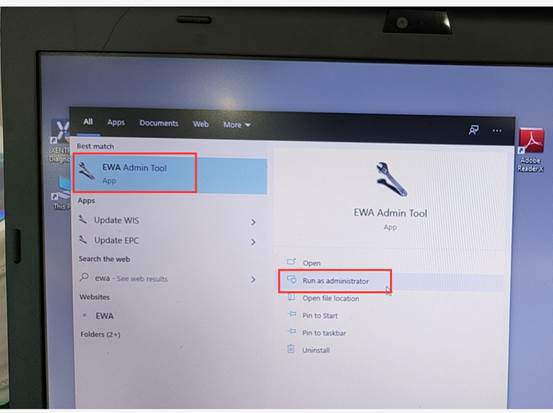
Press windows icon on the tool bar. Find EWS program
Right click to open EWA as administrator
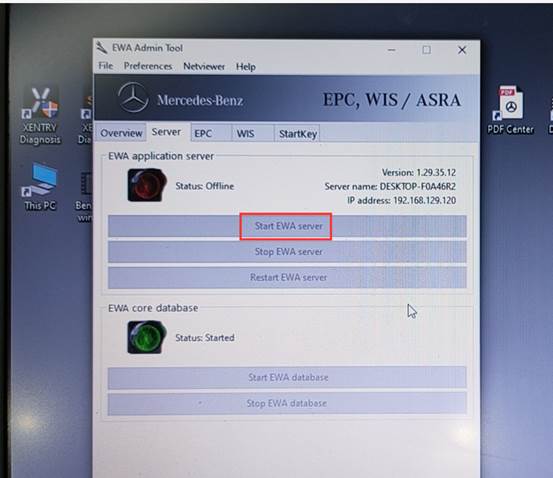
Then Started EWS server

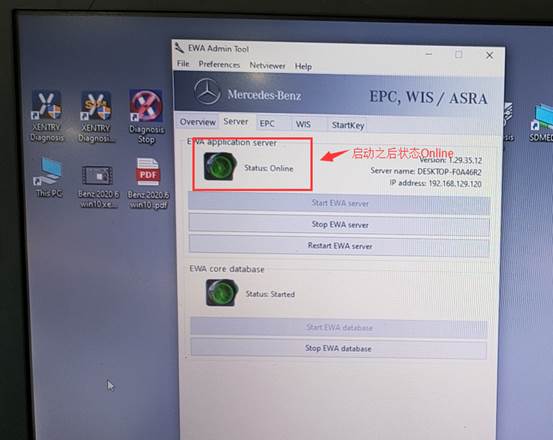
It will show online status if it is working.
mb-sd-c4-ews-This-site-cannot-be-reached-2
mb-sd-c4-ews-This-site-cannot-be-reached-3
mb-sd-c4-ews-This-site-cannot-be-reached-4
mb-sd-c4-ews-This-site-cannot-be-reached-5


2021年4月9日星期五

Fixed! SDConnect C4 Hardware ID Changed and Xentry Won’t Start

 Sdconnect-C4-Activation

I have mb Sdconnect C4 to activate code for WIS, EPC, xentry and dts Monaco, and then contacted obd2tool.com engineer and they said ” You can send the activation id to calculate the password, or send it to teamviewer to activate the software for you remotely”, then they connected with teamviewer for Activation code for WIS and EPC, but for some reason hardware id changed (Lan Id is different. Probably because WiFi is on) and then Xentry doesn’t start.

Sdconnect-C4-Activation

Obd2tool.com engineer replied me:

Follow the steps below;

1.  Delete the lic-key2.dat file under the C drive directory

(C:/Programdata/LicDir)

2.  The activation code of xentry is still deactivated by the one given to you before, and then a new lic-key2.dat will be generated under the C drive directory (C:/Programdata/LicDir)
3.  Copy a copy of lic-key2.dat, change the copy to a lic-key2.x4711 file, and then set the file attribute to read-only

Update!

Everything ok now. Xentry,Wis and Epc starts. Know i have to test the Sd connect C4 to a car.

Many thanks for their professional after-sale service.


If you want to know more about MB Star diagnostic tools, please visit our webiste www.obd2tool.com

If you want to know more about benz trouble solved, please click Benz Trouble Repair

2021年3月29日星期一

PATHFINDER – NEW JLR DIAGNOSIS SOFTWARE

 DOWNLOAD PATHFINDER UPDATER

http://diagnosticdelivery.jlrext.com/pathfinder/Jaguar_Land_Rover_Connect_Updater_v2.exe

What is PATHFINDER?

PATHFINDER is the all new diagnostic system specifically designed and released for the introduction of the following vehicles.

Land Rover:
Range Rover L405 (17MY)
Range Rover Sport L494 (17MY)
New Discovery L462 (17MY)

Jaguar:
F-TYPE X152 (18MY)
F-PACE X761 (18MY)
XE X760 (18MY)
XF X260 (18MY)

These vehicles have been designed to communicate with new high speed communication protocols. This allows faster software download, programming and communication, making it faster to use and saving valuable time.

These vehicles can ONLY communicate with the all new PATHFINDER diagnostic software using the new Diagnostics over Internet Protocol (DoIP) Vehicle Communication Interface (VCI) unit which conforms to the new communication protocol.

What do I need to use PATHFINDER?

Panasonic Toughbook / Toughpad

JLR Approved Diagnostic Equipment For PATHFINDER to operate at its very best, the laptop or tablet being used must be an approved version/level of hardware.

Note: For further information on approved hardware to support PATHFINDER, refer to: – Administration Bulletins JAB00046 / LAB00051

2021年3月12日星期五

How-To: Crankshaft Variation Learn Procedure (Tech2)

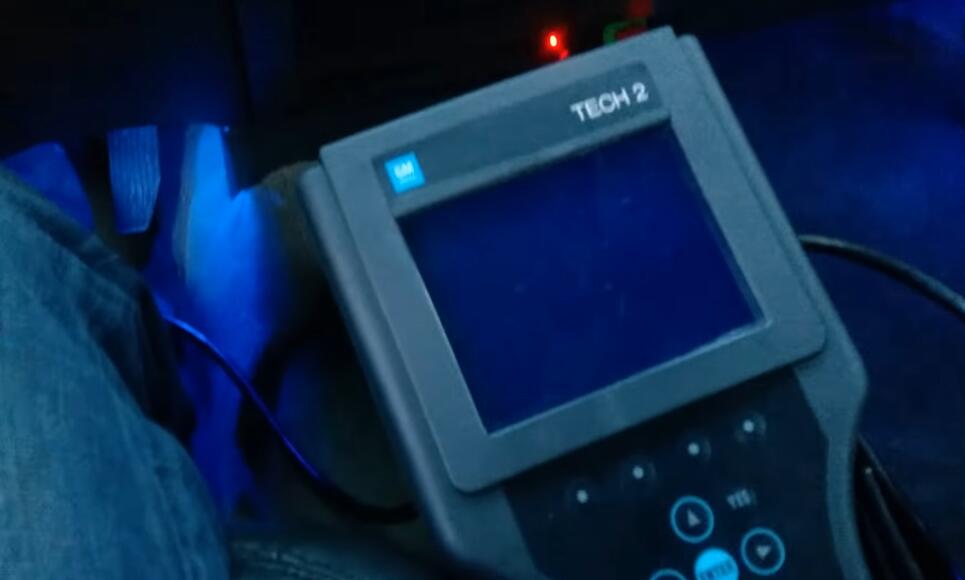
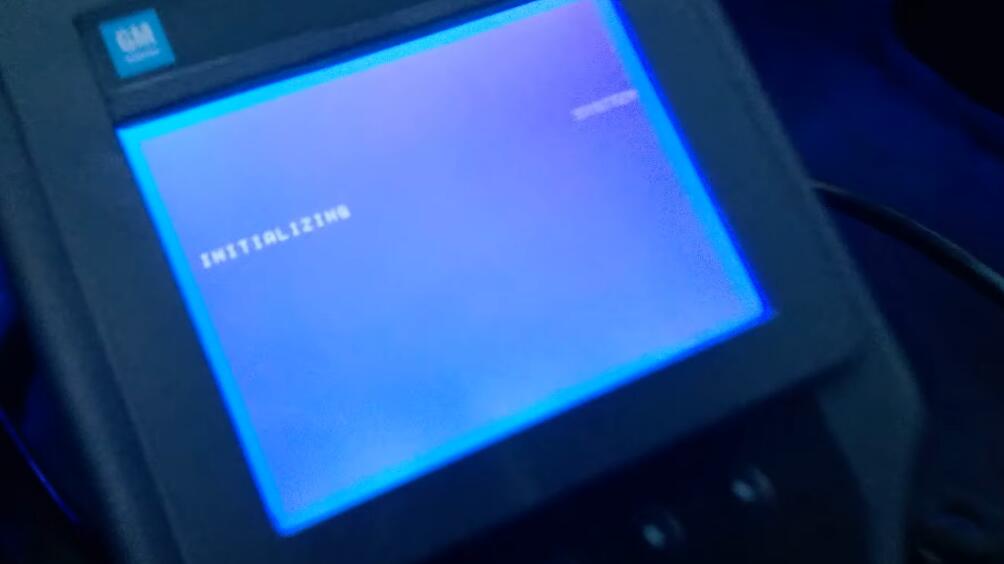
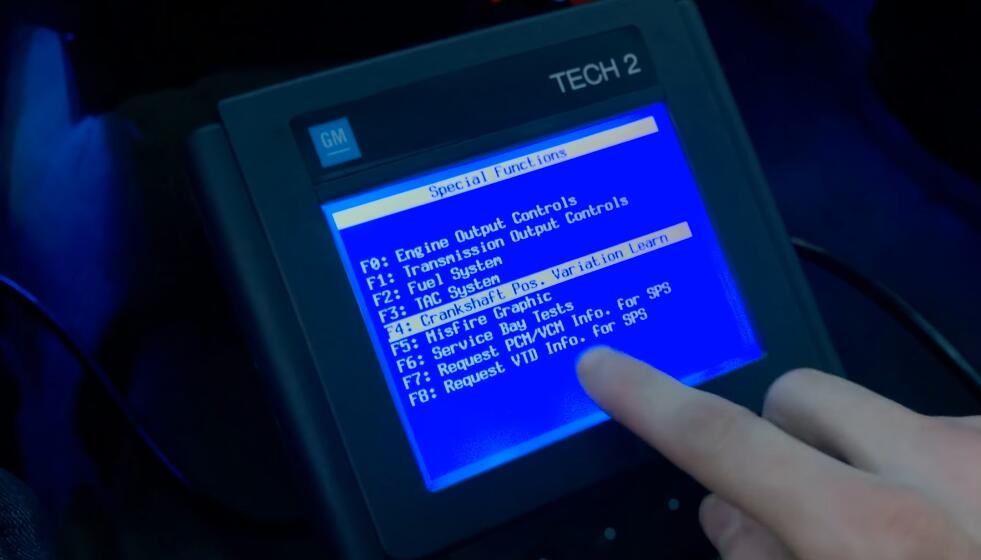
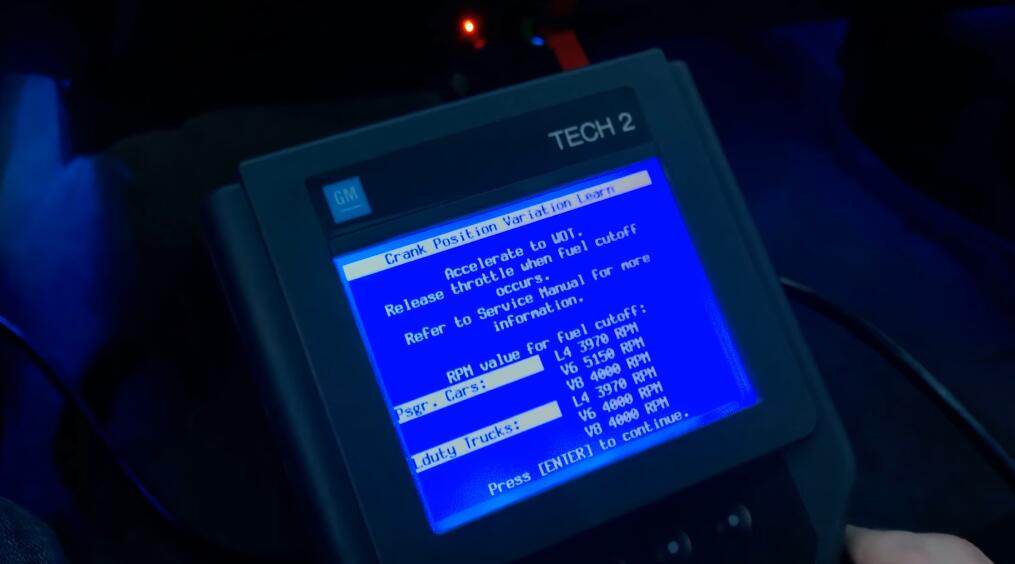
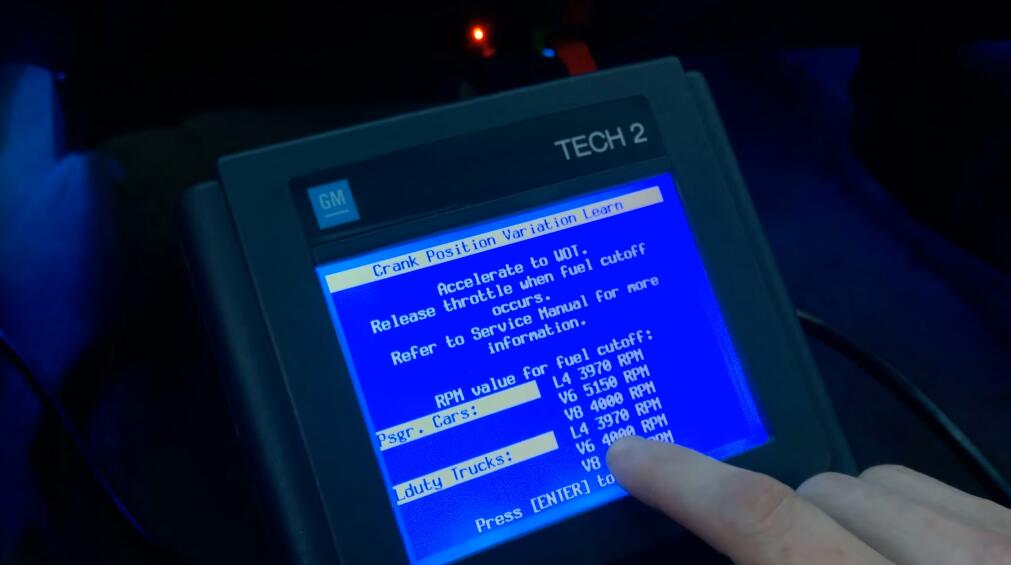
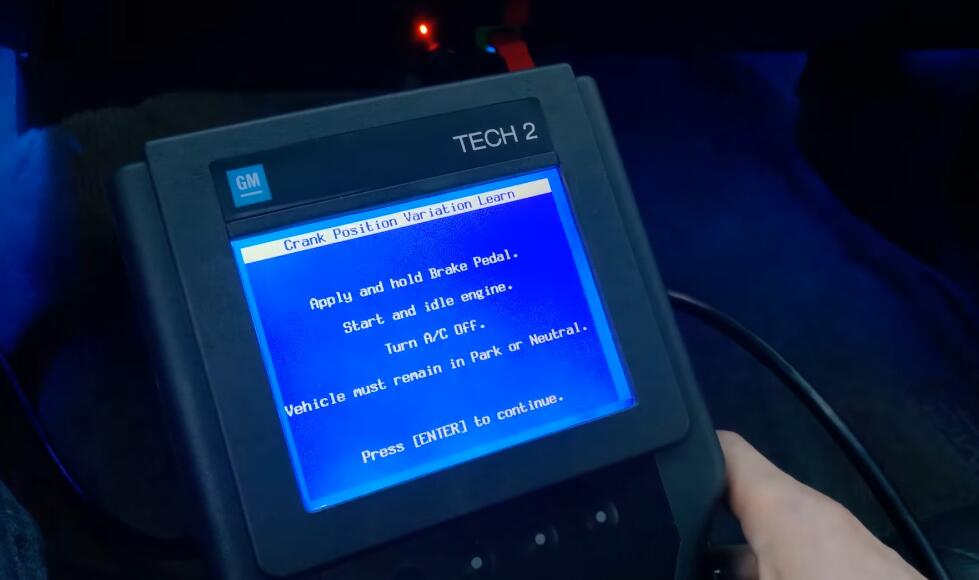
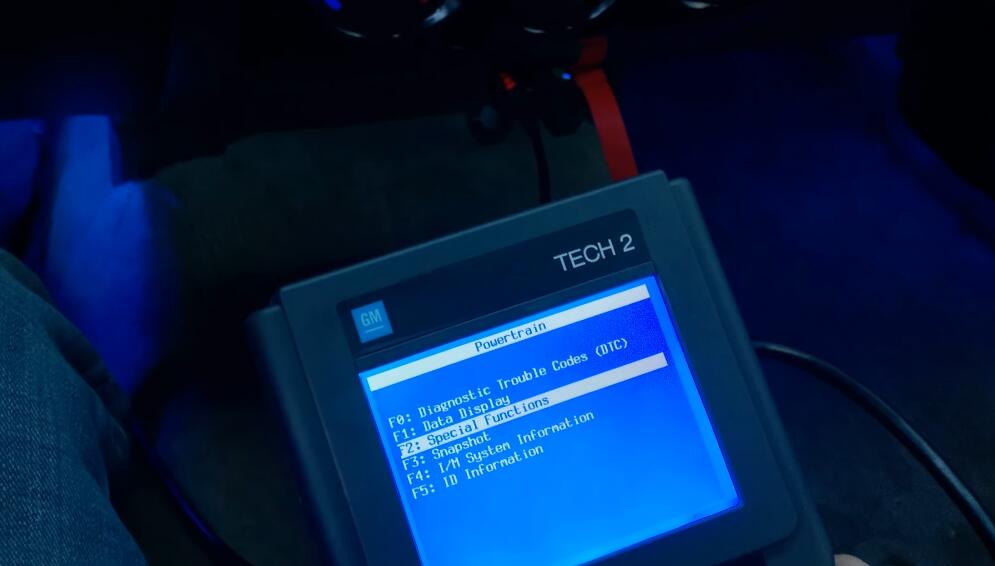
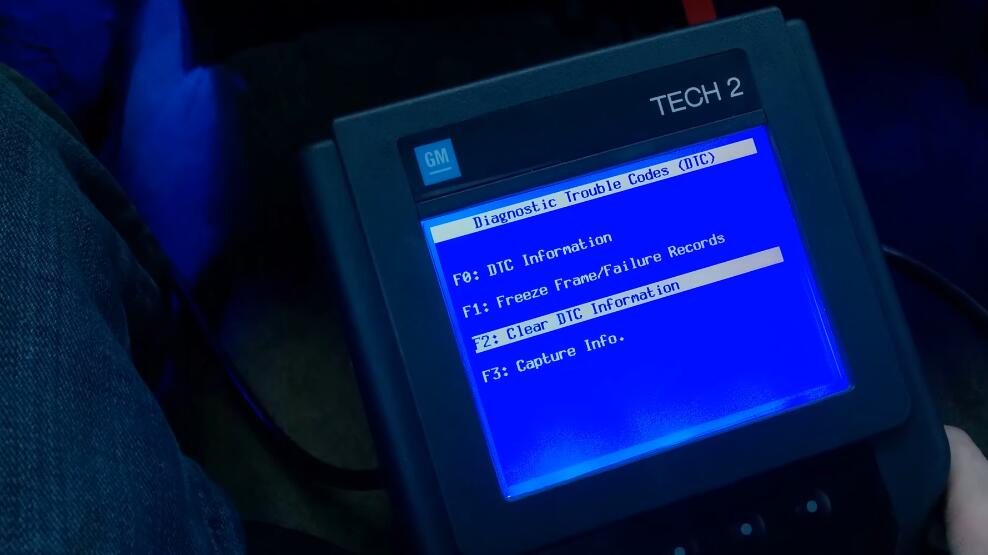
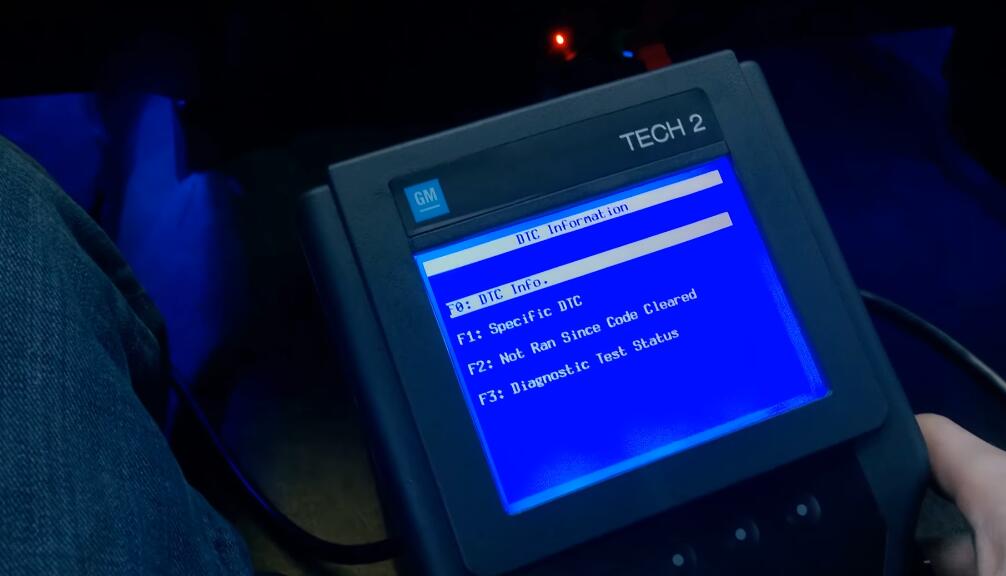
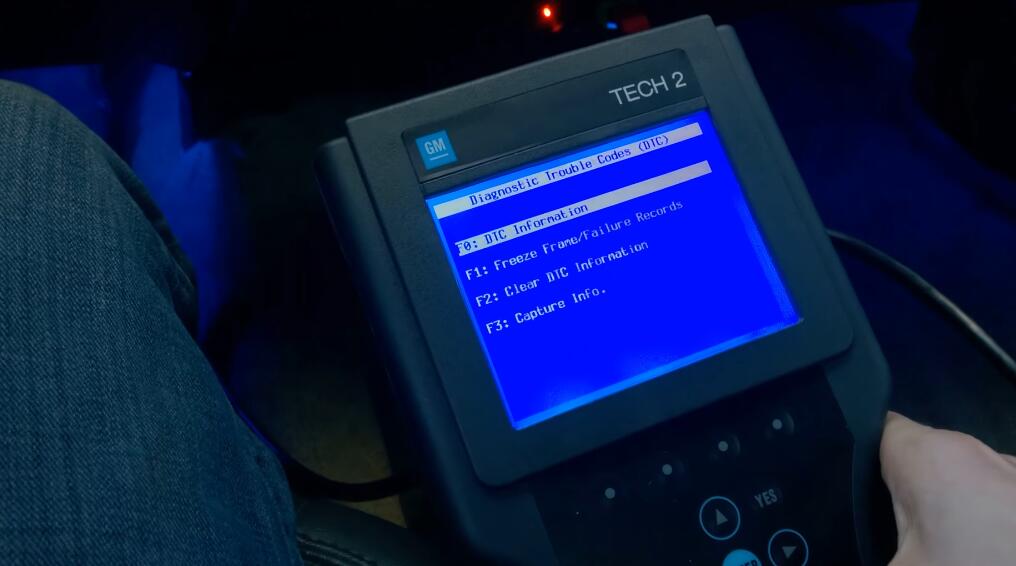
 When swapping motors, replacing crankshaft position sensors, or tuning; sometimes a P0315 code will pop up that requires you to do a Crankshaft Position Variation Learn sequence. This can be done with a Tech 2 Scanner, which is what I will be showing you how to do.

How to clear a P0315: Crankshaft Position Relearn code using a Tech2 on a 2004-2012 Chevy/GMC Colorado/Canyon.

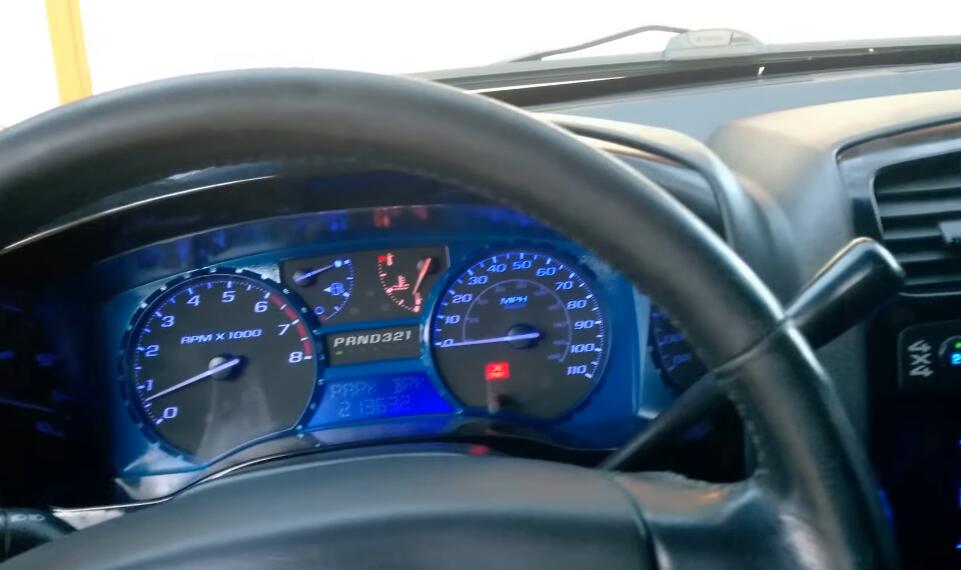
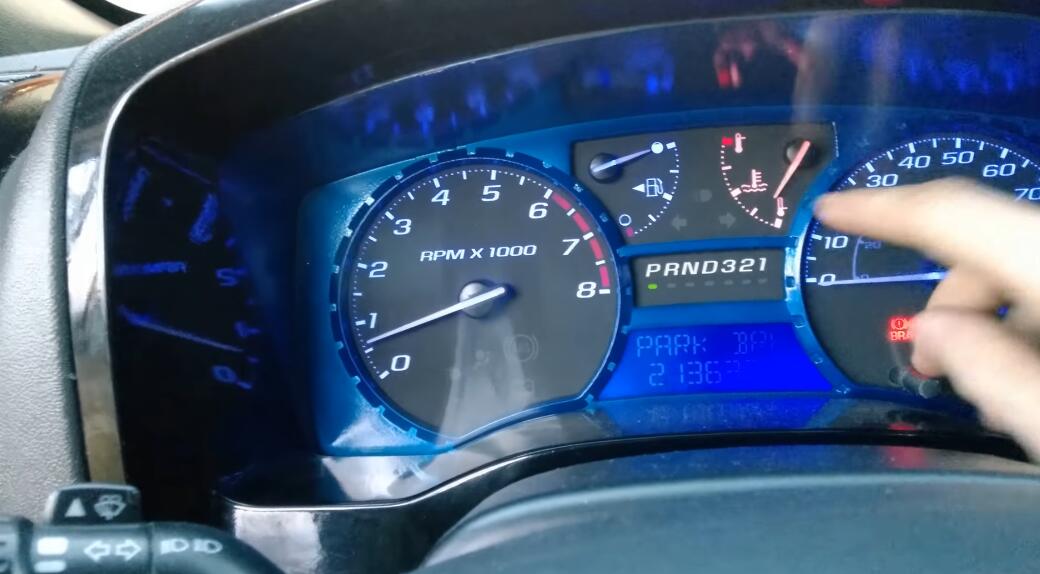
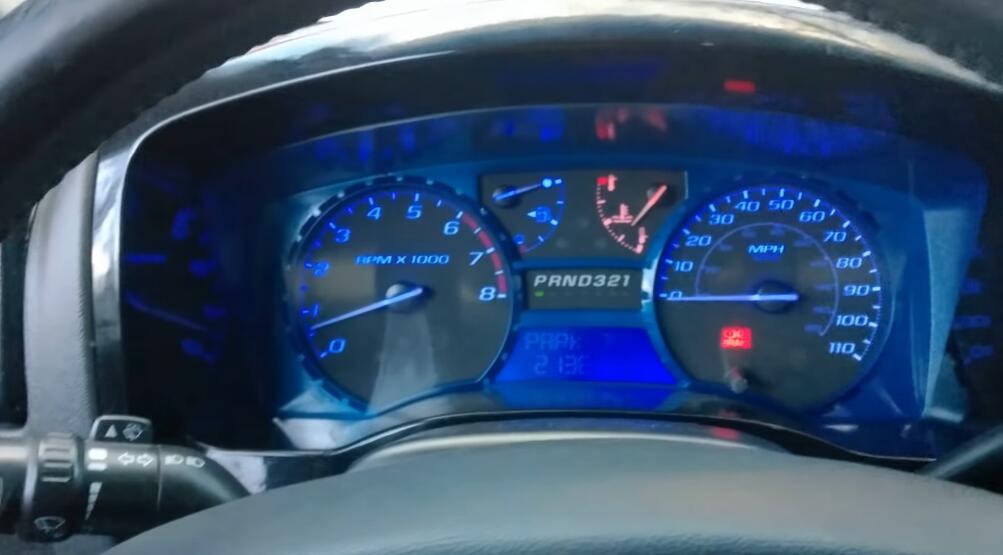
My truck is 2005 GMC Canyon. I swapped motors and needed to clear a persistent P0315 code, here’s a how to on using a GM Tech2 to clear the code.

Project Vehicle
Make: GMC
Model: Canyon
Year: 2005
Engine: 3.5L

Tools Needed
GM Tech2 Scanner

Project Time
5 minutes

Project Cost
Renting or borrowing a Tech2 Scanner

Process:

The steps shown in this video will effectively remove the P0315 code that may occur when swapping motors, tuning, or replacing the crankshaft position sensor.

Images:

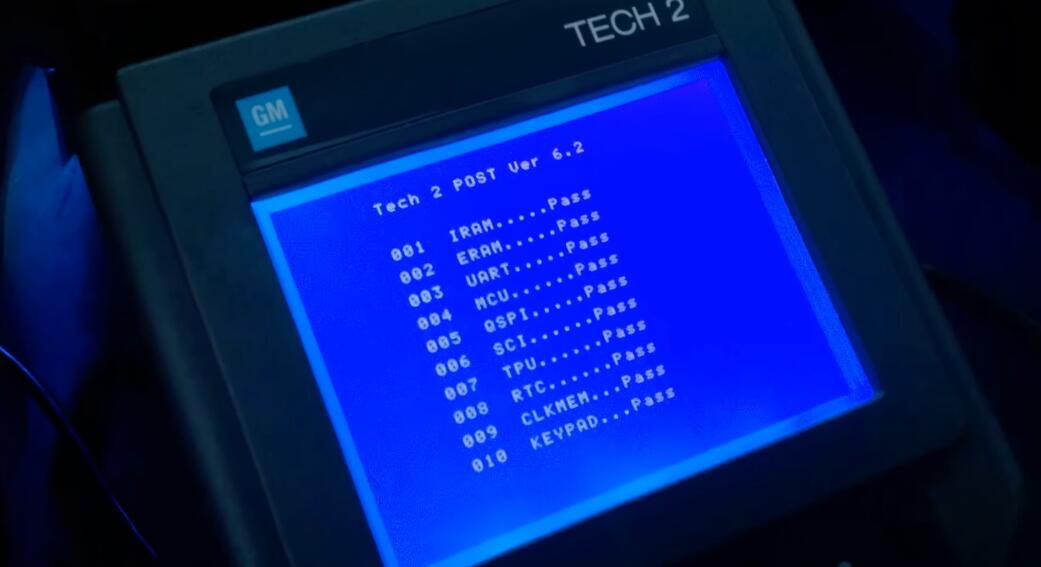
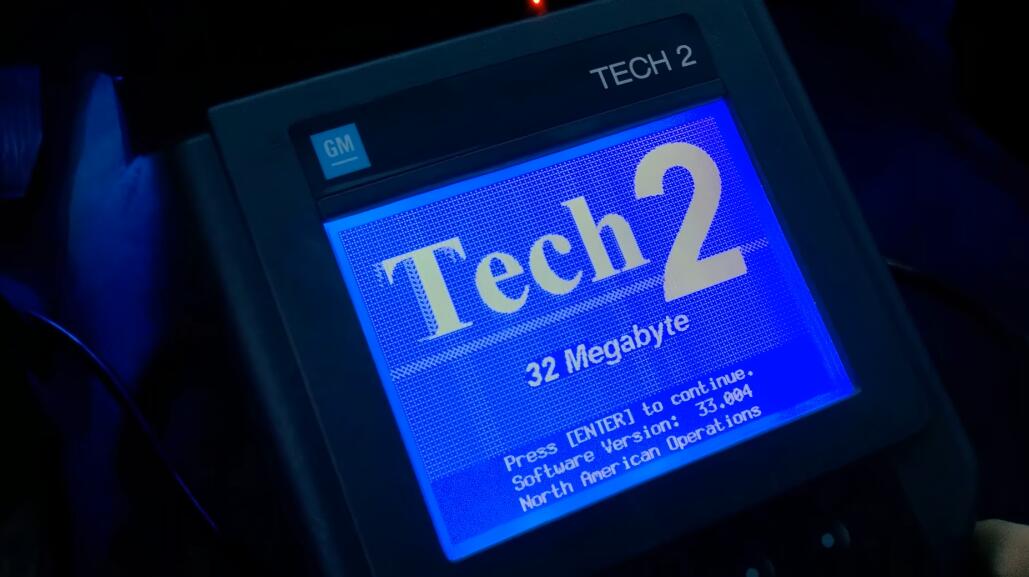
How-To-Crankshaft-Variation-Learn-Procedure-by-Tech2-1
How-To-Crankshaft-Variation-Learn-Procedure-by-Tech2-2
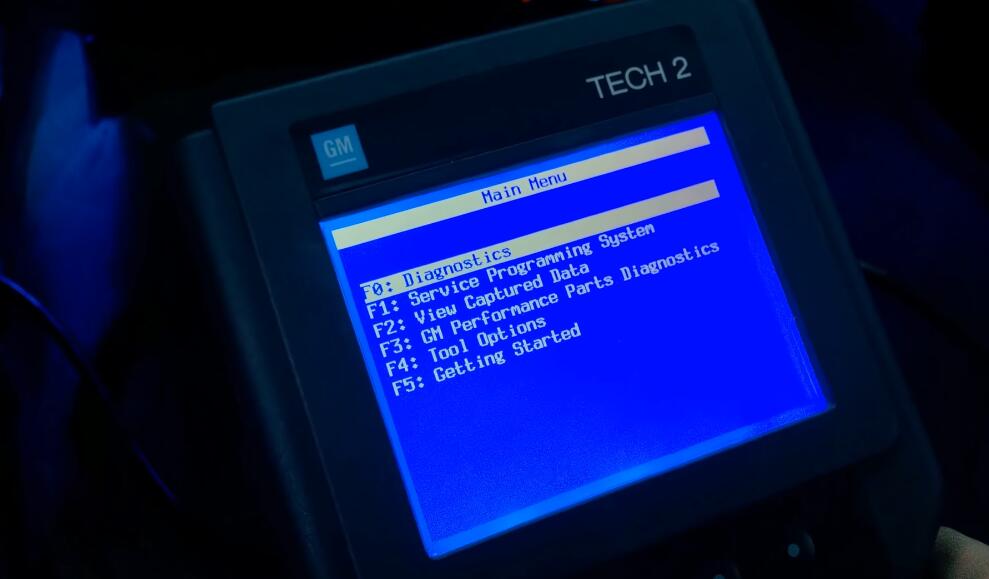
How-To-Crankshaft-Variation-Learn-Procedure-by-Tech2-3
How-To-Crankshaft-Variation-Learn-Procedure-by-Tech2-4
How-To-Crankshaft-Variation-Learn-Procedure-by-Tech2-5
How-To-Crankshaft-Variation-Learn-Procedure-by-Tech2-6
How-To-Crankshaft-Variation-Learn-Procedure-by-Tech2-7
How-To-Crankshaft-Variation-Learn-Procedure-by-Tech2-8
How-To-Crankshaft-Variation-Learn-Procedure-by-Tech2-9
How-To-Crankshaft-Variation-Learn-Procedure-by-Tech2-11
How-To-Crankshaft-Variation-Learn-Procedure-by-Tech2-12
How-To-Crankshaft-Variation-Learn-Procedure-by-Tech2-13
How-To-Crankshaft-Variation-Learn-Procedure-by-Tech2-14
How-To-Crankshaft-Variation-Learn-Procedure-by-Tech2-15
How-To-Crankshaft-Variation-Learn-Procedure-by-Tech2-16
How-To-Crankshaft-Variation-Learn-Procedure-by-Tech2-17
How-To-Crankshaft-Variation-Learn-Procedure-by-Tech2-18
How-To-Crankshaft-Variation-Learn-Procedure-by-Tech2-19
How-To-Crankshaft-Variation-Learn-Procedure-by-Tech2-20

Yay, no codes!

2021年3月4日星期四

GM MDI 2 Clone is Compatible with Original GDS2 Software

 The GM MDI 2 multiple interface will transfer data faster than a MDI 1/ VCX Nano GM (since its a MDI1 clone).  The GM MDI2 clone blue box are out,  running about $200, it is really needed for the 2020 and future cars that will be running the future global B platform.

Hence installing the needed software to get everything to run can be almost brain damage if you are not tech savvy, and because of this, There is the MDI 2 clone with cracked free type software already loaded on a Sata Hard drive for $260.

MDI2 with 2020.09 HDD v8.3.103.39 gds2 tech2win
It will work on win10, but the cracked software for MDI2 clone requires win7.

Tips:

1. If you purchased V2020.09 GM MDI GDS2 Tech2win software Sata HDD, please directly plug it into your computer with Win7 OS, then confirm if the driver can be used, that’s oaky, it is not necessary to install by yourself.

If it prompt update the JAVA, please don’t update it otherwise the GDS won’t be working.

If it prompt update the firmware, just do it.

*   After updating gm mdi manager, please update the firmware simultaneously.

Check: Update GM MDI/MDI2 Firmware

*   The WIFI GM MDI 2 Multiple Diagnostic Interface from obd2tool is compatible with the original Bosch GDS2 software, as long as the user has License by yourself.

Gm-Mdi-2-Is-Compatible-With-Original-Gds2-Software-1 (2)
Gm-Mdi-2-Is-Compatible-With-Original-Gds2-Software-2 (2)

Customer feedback on MDI2 clone and genuine GDS:

“I just received my MDI II clone a couple of days ago and did a firmware update to make sure the latest v2020.12 Bosch software would recognize it and update it and it did with no problem. Programmed an ECM on bench. Connecting it through ACDelco Tis2Web and then use SPS to program the actual controller.

It is verified working with bosch GDS just as the seller advertised.”

If someone is looking to buy a global B platform car, and needs a tool that will work on both it and the older cars like the C6 corvette, gm mdi2 clone really is the ticket. As for right now for a C6 and “A” platform cars, the vxdiag vcx nano gm has you covered for $109 instead.

2021年2月20日星期六

VW JETTA 2013 ADDS NEW BLADE KEY WITH AUTEL MAXIIM IM608

 This tutorial is about how to add new blade key with Autel IM608 and XP400 Pro on Volkswagen Jetta 2013. It applies to the user who is a new to the VW systems or who just wants to know what the MaxiIM IM608 scan tool can do.

What will you learn?

1.What tools and setup are required to do this procedure

2.Commonly used terms you will encounter working with VW’s

3.Identify the different VAG IMMO generations

4.Identify the different VAG IMMO systems

5.How to add a key to a 2013 VW Jetta by Autel MaxiIM IM608

1.What tools and setup are required to do this procedure

Autel MaxiIM IM608 Pro auto key programmer

XP400 Pro programmer

One 2013 VW Jetta working key

One new blade key

VW-JETTA-2013-ADDS-NEW-BLADE-KEY-WITH-AUTEL-MAXIIM-IM608-2VW-JETTA-2013-ADDS-NEW-BLADE-KEY-WITH-AUTEL-MAXIIM-IM608-3VW-JETTA-2013-ADDS-NEW-BLADE-KEY-WITH-AUTEL-MAXIIM-IM608-4VW-JETTA-2013-ADDS-NEW-BLADE-KEY-WITH-AUTEL-MAXIIM-IM608-5VW-JETTA-2013-ADDS-NEW-BLADE-KEY-WITH-AUTEL-MAXIIM-IM608-6VW-JETTA-2013-ADDS-NEW-BLADE-KEY-WITH-AUTEL-MAXIIM-IM608-2VW-JETTA-2013-ADDS-NEW-BLADE-KEY-WITH-AUTEL-MAXIIM-IM608-3VW-JETTA-2013-ADDS-NEW-BLADE-KEY-WITH-AUTEL-MAXIIM-IM608-4VW-JETTA-2013-ADDS-NEW-BLADE-KEY-WITH-AUTEL-MAXIIM-IM608-5VW-JETTA-2013-ADDS-NEW-BLADE-KEY-WITH-AUTEL-MAXIIM-IM608-6VW-JETTA-2013-ADDS-NEW-BLADE-KEY-WITH-AUTEL-MAXIIM-IM608-2
Connection:

1.Connect Autel IM608 tablet and XP400 Pro via USB cable

2.Connect IM608 and J2534 programmer via VCI USB cable

3.Connect J2534 to the vehicle’s DLC via main OBD cable

VW-JETTA-2013-ADDS-NEW-BLADE-KEY-WITH-AUTEL-MAXIIM-IM608-3

Note: Don’t connect XP400 Pro to the vehicle directly! Otherwise it will cause the device to burn out!

In general, we’ll connect the VCI via Bluetooth, but here recommend you to use VCI USB cable. The reason is that sometimes depending on the vehicle, you’re working on the Bluetooth connectivity can let’s say interrupt the key relearning operation. To avoid that any frequencies doing that, just give it a direct connection and to tell you the truth it actually will run through. Its sequence a little bit faster than Bluetooth.

2.Commonly used terms you will encounter working with VW’s

Dealer key: a dealer key is a key that must be preconfigured to a specific VIN before it can be learned into the vehicle. (The vehicle will reject and key that is not preconfigured before hand, even when the transponder type is correct).
Learn key:All keys lost will be cleared then learned via ignition switch
Add key:With the serial programmer (XP400 Pro), the key will be added to the system
Service mode:In order to gain access and read info from the vehicle, it must be in a service mode state. That dash turns off even though the ignition is on.
Pin code: A 4 to 5 digit number needed to code new keys on VVW/AUDI IMMO systems.
Transponder key:A transponder key is a key with a “microchip” or a RF transmitter built into the plastic head of the key. IT transmits a low-level signal from a key that is read by a remote receiver.
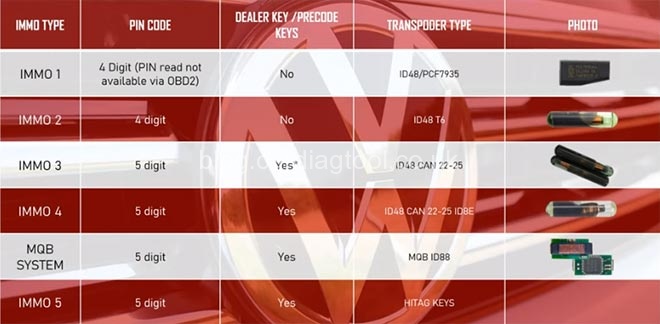
3.Identify the different VAG IMMO generations

VW-JETTA-2013-ADDS-NEW-BLADE-KEY-WITH-AUTEL-MAXIIM-IM608-4

IMMO 1 would probably start off from year 2004. It requires a four-digit PIN code, but you cannot get the PIN via OBD, you probably have to do this via bench with the serial number. It does not require a dealer key and the transponder type is ID48/PCF7935.
IMMO2 is probably between the year 2000 and 2005. It requires a four-digit PIN code and it also does not need a pre-coded key and the transponder type key is ID48 T6.
IMMO 3 is probably between year 2004 and 2009. It requires a five-digit PIN code and it also requires pre-coded keys. However there are some scenarios where it does not require. Only VW will like IMMO and IMMO 4. There’s a lot of integration between them.
IMMO 4 would probably go between year 2005 and 2019. It requires a five-digit PIN code and it also requires pre-coded keys.
MQB system is probably between year 2013 and up. It requires a five-digit PIN code and it also requires pre-coded keys.
IMMO 5 is probably between year 2009 and 2019. It requires a five-digit PIN code and it also requires pre-coded keys.
4.Identify the different VAG IMMO systems

Learning each generation’s immobilizer system will help you understand how to approach that particular key coding.

IMMO 1 uses the IMMO Box
IMMO 2 uses the instrument K-line
IMMO3 uses the instrument CAN
IMMO 4 uses the instrument CAN, Kessy system, MQB system, EZS system and comfort module.
IMMO 5 uses BCM2
5.How to add a key to a 2013 VW Jetta by Autel MaxiIM IM608

Step 1: Insert the working blade key into the key slot

Step 2: Turn the key into position 1 (Don’t ignite car engine)

Step 3: Select “IMMO” in IM608 tablet

Step 4: Identify vehicle model automatically

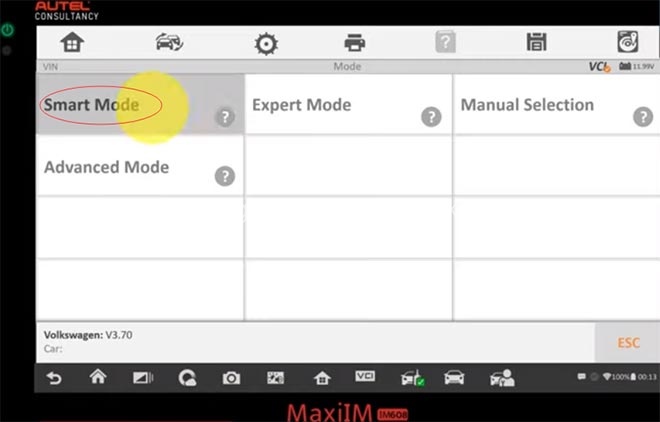
Step 5: Select “Smart mode”

VW-JETTA-2013-ADDS-NEW-BLADE-KEY-WITH-AUTEL-MAXIIM-IM608-5

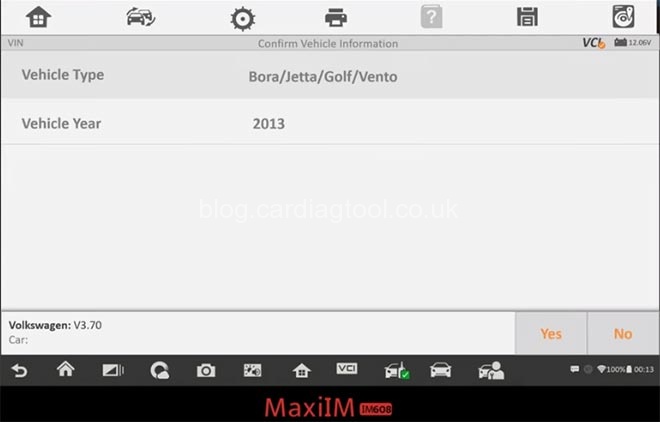
Step 6: Confirm the vehicle info

VW-JETTA-2013-ADDS-NEW-BLADE-KEY-WITH-AUTEL-MAXIIM-IM608-6

Step 7: Analyzing vehicle immobilizer type automatically…

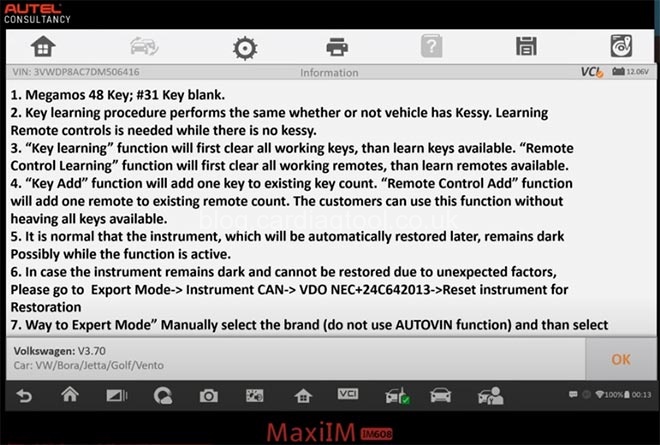
Step 8: Read the operation instruction and press “OK”

VW-JETTA-2013-ADDS-NEW-BLADE-KEY-WITH-AUTEL-MAXIIM-IM608-7

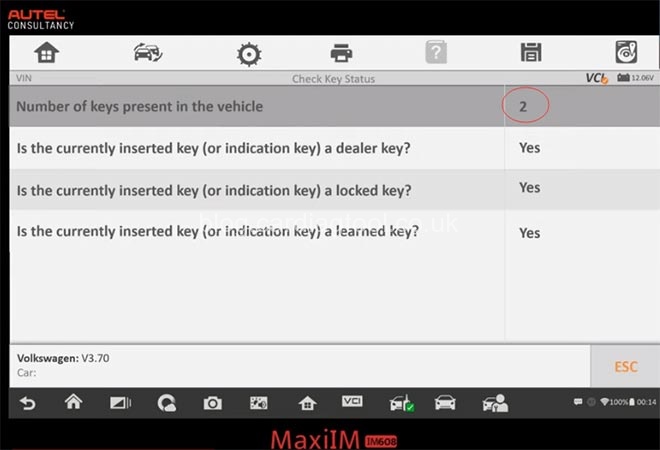
Step 9: Check the key status and click “ESC”

The current key number is 2.

VW-JETTA-2013-ADDS-NEW-BLADE-KEY-WITH-AUTEL-MAXIIM-IM608-8

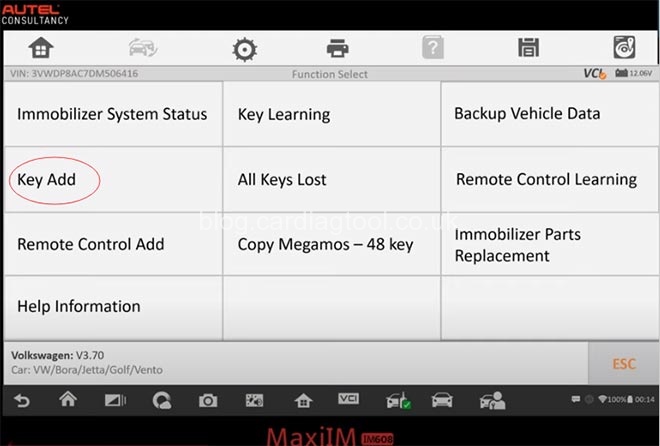
Step 10: Select “Key Add”

VW-JETTA-2013-ADDS-NEW-BLADE-KEY-WITH-AUTEL-MAXIIM-IM608-8VW-JETTA-2013-ADDS-NEW-BLADE-KEY-WITH-AUTEL-MAXIIM-IM608-9

Step 11: Confirm to use Key Add function

Note: If vehicle with Kessy, the remote start function may fail after using key add function. For the vehicle to start, the key need to be pressed close to the key indication area.

Step 12: Read IMMO data

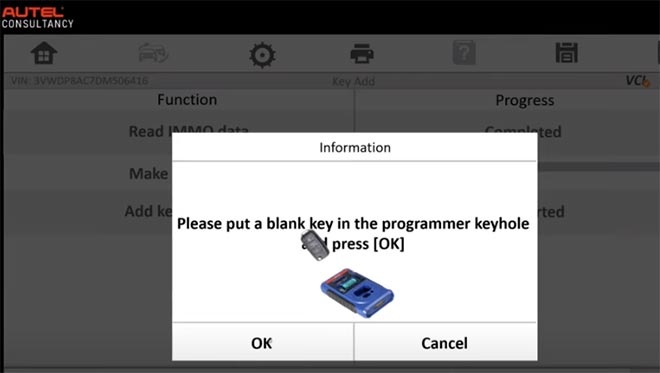
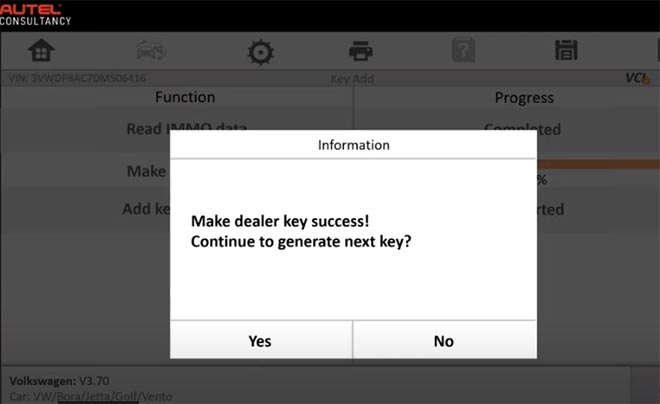
Step 13: Make dealer key

->> Confirm to make a dealer key

->> Put the blank key in the XP400 programmer key hole and press “OK”

VW-JETTA-2013-ADDS-NEW-BLADE-KEY-WITH-AUTEL-MAXIIM-IM608-10

->> Make dealer key successfully

Confirm to make next key or not depends on your need

VW-JETTA-2013-ADDS-NEW-BLADE-KEY-WITH-AUTEL-MAXIIM-IM608-11

Step1 4: Add key to vehicle

Note: The instrument will have a black screen, which is normal. It will illuminate automatically later.

The following operation will modify the instrument data. The ongoing process is non-interruptible, or it may cause the damage to the instrument.

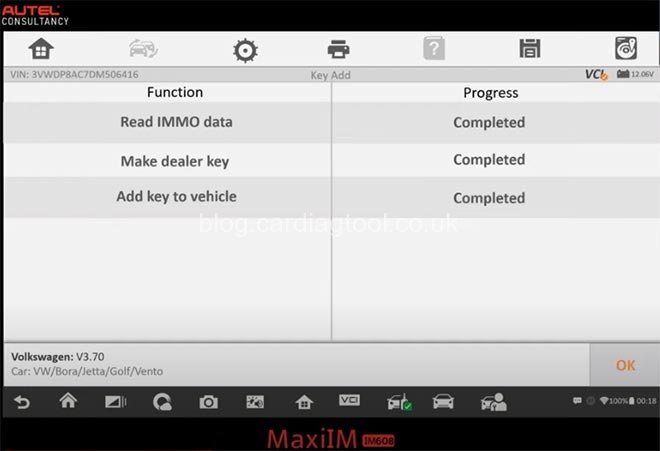
Step 15: Adding new blade key by Autel IM608 key programmer is completed.

VW-JETTA-2013-ADDS-NEW-BLADE-KEY-WITH-AUTEL-MAXIIM-IM608-12

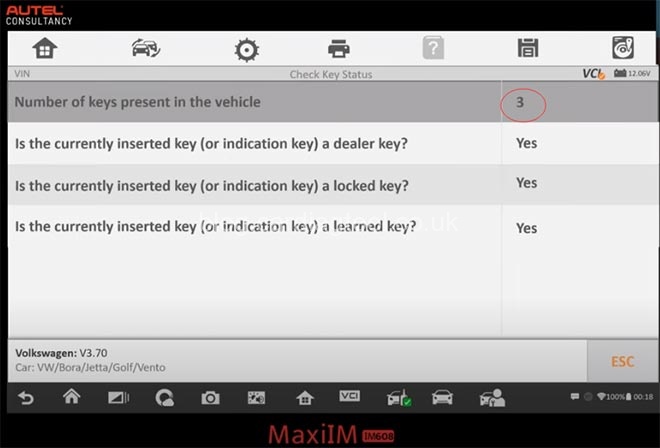
Step 16: Check the key status, now the number of keys present in the vehicle is 3.

VW-JETTA-2013-ADDS-NEW-BLADE-KEY-WITH-AUTEL-MAXIIM-IM608-13

Finally, test the new key function to see if everything is working.

Done!

Please kindly notice:

Some instances when you do a key coding procedure, the remote settings might be lost. Sometimes they don’t and they will be fine. If it does you need to go to the remote control learning and relearn the amount remote.

To sum up:

1.It’s a good practice to use a direct connection when doing key coding (No Bluetooth connected)

2.Dealer key is a key that needs to be preconfigured in before it can be learned to the vehicle. (Doesn’t mean it needs to order from dealer).

3.If your accidently erase the original key, you just have to learn the key again by selecting the key learning option. Since the key is already preconfigured there no need to make a dealer key.

4.Certain cases the remote will automatically be configured. Most cases you will need to configure the remotes separately from the immobilizer.

5.You can use aftermarket keys but you may run into quality issues with the key.

Autel IM608 Pro key programmer comes with MaxiIM IM608 tablet, XP400 Pro key programmer, MaxiFlash ECU reprogrammer and key programmer adapter kit (optional), which adds more advanced functions than IM608.
HOW TO ENTER THE GATEWAY WITH THE LAUNCH SCAN TOOL

 How-Does-Launch-X431-Scanners-bypass-FCA-Security-Gateway-1

Launch Scan Tools (i.e Launch X431 V+, X431 V 8 inch, X431 Throttle, X431 Torque, X431 Turbo, X431 PAD V) updated 2017 and later FCA Chrysler Jeep Dodge Fiat Vehicles with Secure Gateway Module (SGW): Register with AutoAuth to enable your LAUNCH scan tool to communicate with the FCA SGW Authentication System and bypass the SGM, so as to perform diagnostics and bi-directional without using a bypass cable.
Background: Starting in 2018, FCA US has been equipped with a Security gateway firewall that is new to the car industry. The logic behind this Gateway is to secure the vehicle’s control systems against security threats and other issues as car ecosystems become more connected and advanced. To access this Gateway your scan tool will need to be authorized by Auto Auth. There are a few steps that you will need to complete in order to gain authorization to the FCA US Gateway.

4 Steps to Enter the Gateway

Follow these Steps to Authenticate your Launch Scan Tool with the SGW

Step 1. Register your Shop&Techs accounts on Autoauth, and add users (Techs) to Shop.

Shop Owner Instructions:

Register your Shop account at AutoAuth.Com.

There is a $50 Annual fee for each shop account. Six Users are allowed access on the shop account and you are automatically covered. There will be a $2/annual fee for adding additional users.

How-Does-Launch-X431-Scanners-bypass-FCA-Security-Gateway-1

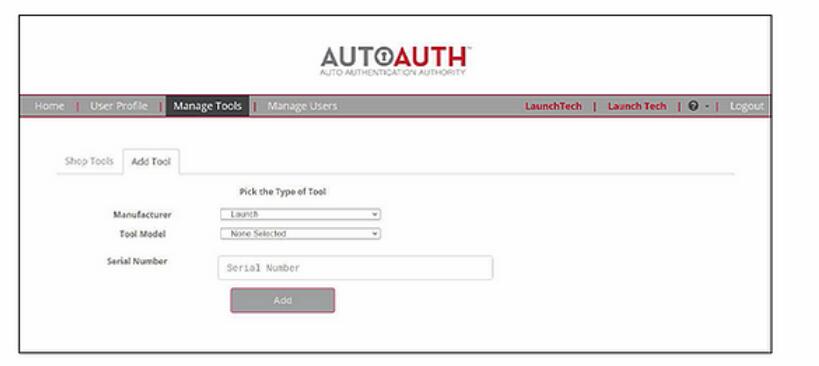
Step 2. The following step allows you to add your Launch scanners to your shop profile, this enables all users in the shop account access to SGW with any scan tool added.

In This step, the shop owner will be able to add the technician’s Launch Scan Tools to the shop profile . This will allow all of the technicians in the shop to have access to the SGW with their Launch Scan Tool.

Select Launch as the manufacturer and the appropriate tool model from the dropdown menu and the serial number.

How-Does-Launch-X431-Scanners-bypass-FCA-Security-Gateway-2

Step 3. This step ensures that you have the latest Launch diagnostic software.

Get V33.18 or newer Chrysler software in update center if within subscription, or contact the dealer to renew.

Update APK in update center:
• Throttle: V7.00.035 or newer
• Torque: V7.00.043 or newer

Internet connection, start diagnosis now.
​
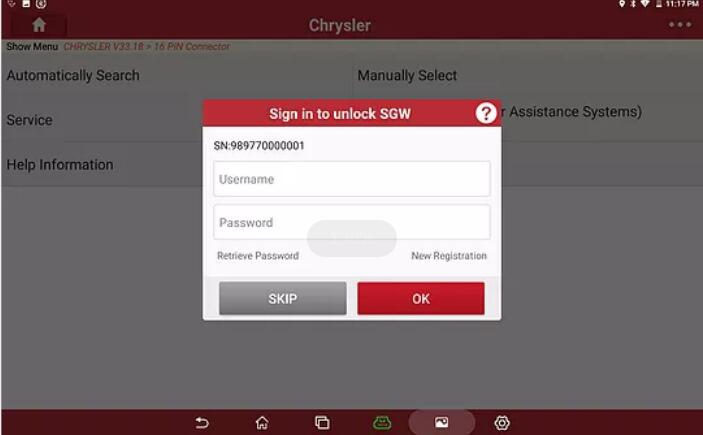
Step 4: This step is the login prompt for the SGW where you will enter your valid login credentials from AutoAuth.  Be sure to have a stable network connection to avoid any connectivity issues and delays. Once you have entered your login, you would of gained access to the SGW.

How-Does-Launch-X431-Scanners-bypass-FCA-Security-Gateway-3