2022年2月15日星期二

How to Connecting CUMMINS Engines using Cummins INSITE Software

 How to Connecting CUMMINS Engines using Cummins INSITE Software

Cummins INSITE

How-to-Connecting-CUMMINS-Engines-using-Cummins-INSITE-Software-1

#To Connect to an ECM
1). Open Cummins INSITE through shortcut on desktop, using Status bar to select a connection options.

How-to-Connecting-CUMMINS-Engines-using-Cummins-INSITE-Software-2

2). Click the dropdown box on the Status bar to view a list of all currently available connection options, or click Add New to create one, then click Next.

How-to-Connecting-CUMMINS-Engines-using-Cummins-INSITE-Software-3

3). Use the ECM Connection Type page, and choose Datalink Adapter (Connect using a Datalink Adapter), then click Next.

How-to-Connecting-CUMMINS-Engines-using-Cummins-INSITE-Software-4

4). Select Connection Settings, Datalink Adapter Vendor, Datalink Adapter, and Datalink Protocol, then click Next.

How-to-Connecting-CUMMINS-Engines-using-Cummins-INSITE-Software-5
How-to-Connecting-CUMMINS-Engines-using-Cummins-INSITE-Software-6
How-to-Connecting-CUMMINS-Engines-using-Cummins-INSITE-Software-7

6). Click Connect to ECM.
→If you are connecting to a new ECM or an ECM without existing ECM passwords, select “None” in the Security Type: dropdown list.
→If you then want to define ECM security type passwords, select ECM Passwords on the Tools menu once connected to the ECM.

7). The Work Order Wizard is automatically displayed for you to create a work order for the selected connection, then click OK.
→You can disable the Wizard from starting automatically by unchecking the Enable Work Order Mode checkbox in the Work Orders page of the Options window. Read More: Work Orders on Cummins INSITE Software (CUMMINS Engines).

How-to-Connecting-CUMMINS-Engines-using-Cummins-INSITE-Software-8

8). Wait the Work Order/Image Creation until 100% of creating image.

How-to-Connecting-CUMMINS-Engines-using-Cummins-INSITE-Software-9
How-to-Connecting-CUMMINS-Engines-using-Cummins-INSITE-Software-10


ECM Time on Cummins INSITE Software (CUMMINS Engines)

 ECM Time on Cummins INSITE Software (CUMMINS Engines)

ECM Time – Engine Hours

ECM-Time-on-Cummins-INSITE-Software-1

During operation of the Engine, the ECM records and stores information related to a wide range of events, which includes time stamping. Two different measures of time are available:
1). ECM Time (Key On Time), which is the cumulative ECM hours (HH-MM-SS), refer to Figure 1.1 above, while Engine Hours (Engine Run Time) is cumulative time as the Engine is running (HH-MM-SS).

ECM-Time-on-Cummins-INSITE-Software-2

2). ECM Real Time, which gives a date and 24 hours based time stamp. This feature allows automatic synchronization of ECM Real Time to match the PC Date and Time or a manual change to enter the current ECM Real Time. It is also important to ensure that the local time zone is set correctly to maintain the correct local time.

A battery backup is used to maintain constant power to the Real Time Clock. If the battery backup is not present, a power loss to the Real Time Clock (such as disconnecting the batteries in excess of 5 seconds) causes a loss of Real Time Clock accuracy. This situation generates fault code 319, and the maintenance lamp will light.

#Enabling the Real Time Clock
To enable the Real Time Clock:
a). From Advanced ECM Data, select Real Time Clock. Read More: Advanced ECM Data on Cummins INSITE Software (CUMMINS Engines).

ECM-Time-on-Cummins-INSITE-Software-3

b). Select the Enable Real Time Clock checkbox.

ECM-Time-on-Cummins-INSITE-Software-4

c). The Real Time Clock can either be set automatically or manually:
→Automatically setting the Real Time Clock
-Verify that the Local PC Date and Time are correctly displayed. If this needs to be corrected, it must be done within Windows. Select Undo and close INSITE™. Adjust the PC Date and Time as needed. If the Local PC Time and Date are correct, select the Auto Set button.
→Manually setting the Real Time Clock
-Verify that the Local Time Zone is correct, and then set the correct date and time in the ECM Date and Time frame. Select Apply to save these settings to the ECM.
d). Follow the prompts to save the changes to the ECM.

ECM-Time-on-Cummins-INSITE-Software-5

Note: Once enabled, the Real Time Clock can NOT be disabled and ECM cumulative hours are no longer available.
e). Select Undo to exit the Real Time Clock window without sending changes to the ECM.

2022年1月29日星期六

Autel CAN FD Adapter Diagnose on a GM Chevrolet Onix E 2020 with DS808 successfully


Autel CAN FD Adapter can expand the support of the CAN FD protocol to specifically support the diagnosis of some new models. Such as 2020+ GM models, 2018- Ford models. The CAN FD Adapter must be used with a supported Autel VCI(vehicle communication interface) to communicate with applicable vehicles.

Workable Autel Diagnostic Tools:
Gen 1 Autel MaxiSys units: MX808/MP808, MS905, MS906, MS906BT, MS906TS, MS908, MS908P, MSELITE.
Gen 2 Autel MaxiSys units: MaxiADAS, MS908S, MS908SPIM508IM608IM608 Pro
Note: Autel Gen 3 units: Ultra, MS919 or MS909 have already supported the protocol, no need for this adapter.

Diagnose on a GM Chevrolet Onix E 2020 with DS808:

It failed to diagnose the vehicle via OBD without CAN FD Adapter for the first time. It prompts “Device unable to communicate with the control unit” on tablet. After connecting with the adapter, it succeed to diagnose fault codes.

Autel-CAN-FD-Adapter-Diagnose-on-a-GM-Chevrolet-Onix-E-2020-with-DS808-successfully-1
Autel-CAN-FD-Adapter-Diagnose-on-a-GM-Chevrolet-Onix-E-2020-with-DS808-successfully-3
Autel-CAN-FD-Adapter-Diagnose-on-a-GM-Chevrolet-Onix-E-2020-with-DS808-successfully-2


OBDSTAR could not connect iPhone hotspot and wifi solution

 Question: OBDSTAR X300 DP Plus (Key Master), x300 pro4 (Key Master 5), ODO Master tablet kilometer programmer (with serial number 90140002 ****) does not connect to the iPhone IOS hotspot or to the WIFI.

User feedback:

Opportunity 1. Telephone hotspot does not work and only works with my home WiFi router, i.e. the mobile WiFi router I ordered, but unfortunately only works when switching to 3G, when switching to 4G no luck to communicate with the server

Opportunity 2. OBDSTAR will search for WIFI for 2 seconds or 3 seconds and then stop.

Opportunity 3. The obdstar screen does not work as it drops from about 2 feet.

OBDSTAR-could-not-connect-iPhone-hotspot-and-wifi-solution-1
OBDSTAR-could-not-connect-iPhone-hotspot-and-wifi-solution-2
OBDSTAR-could-not-connect-iPhone-hotspot-and-wifi-solution-3

Please prepare:

1. Download the firmware for ODOMASTER (Update_XP50)

https://mega.nz/file/z65XjYoY#zjrSo8B2hDDPXEZZ33kiJmB2Pn5T-o4xlJfepfa5syQ

The format of the firmware file name is update-dp[xx]_[yyyyy][mm][dd].img
For example update_dp50_20211221.img means DP50 firmware released on December 21, 2021.

2. Prepare a TF card with a capacity larger than 1G and a TF card reader (shown as below)
Note: All files inside the card will be cleared when operating, please backup first.

OBDSTAR-could-not-connect-iPhone-hotspot-and-wifi-solution-4

3. Download SD_Firmware_Tool_v1.57 .zip

https://mega.nz/file/C7pwXYZJ#KnNiLCGzS58DsNkpgL6p0knCoMHrlfKiVUla-XQB3_g

Backup DP software Note: By updating the firmware, all settings in the device and all software in the DP are deleted. Users who have expired will not be able to download the software again through the one-click upgrade, so the software must be backed up on the device.

Steps:

1. Insert a TF card with a capacity larger than 16G into the OBDSTAR tablet to back up the DP software.

2. Click the Main menu button on the main screen, select and enter ES File Manager.

OBDSTAR-could-not-connect-iPhone-hotspot-and-wifi-solution-5
OBDSTAR-could-not-connect-iPhone-hotspot-and-wifi-solution-6

3. Locate and long press the “DP” folder, select DP folder and click on the “Copy” button.

OBDSTAR-could-not-connect-iPhone-hotspot-and-wifi-solution-7
OBDSTAR-could-not-connect-iPhone-hotspot-and-wifi-solution-8

4. Click the Menu icon on the left, expand the local area, select Home page.

OBDSTAR-could-not-connect-iPhone-hotspot-and-wifi-solution-9
OBDSTAR-could-not-connect-iPhone-hotspot-and-wifi-solution-10

5. Select “external_sd (TF card)”, and then click the “Paste” button. Wait for the copy to complete. After the firmware upgrade is complete. Just overwrite the DP directory from the TF card to the device.

OBDSTAR-could-not-connect-iPhone-hotspot-and-wifi-solution-11
OBDSTAR-could-not-connect-iPhone-hotspot-and-wifi-solution-12

Making upgradable TF card

1. After inserting the TF card into the card reader, insert the card reader into the USB port of the computer.

OBDSTAR-could-not-connect-iPhone-hotspot-and-wifi-solution-13

2. Unzip the SD_Firmware_Tool_v1.57.zip and run SD_Firmware_Tool.exe

3. Follow the steps below.

Note:
All files in the TF card will be erased, if there are important files in the TF card, please back them up before operating.

OBDSTAR-could-not-connect-iPhone-hotspot-and-wifi-solution-14

Operating instructions:
Make sure that your TF card information and capacity size can be seen, if not check that the TF card reader is properly inserted into the USB port.
Click the “Firmware” button to select the firmware file
Click the “Create” button to start writing the firmware file to the TF card

4. Wait for the prompt Creating upgrade disk ok. The upgradable TF card is made successfully.

OBDSTAR-could-not-connect-iPhone-hotspot-and-wifi-solution-15

Update the firmware for obdstar.

Note: plug in the power adapter for the device and ensure that the power indicator is on. Do not power off during the upgrade process.

1. Insert the TF card into the device

OBDSTAR-could-not-connect-iPhone-hotspot-and-wifi-solution-16

2. Make sure the obdstar device is plugged in and the power light is on. Long press the device power button and select Reboot.

OBDSTAR-could-not-connect-iPhone-hotspot-and-wifi-solution-17

3. obdstar device will automatically perform a firmware upgrade and a progress bar will appear.

OBDSTAR-could-not-connect-iPhone-hotspot-and-wifi-solution-18

4. When screen says ‘Doing Activation Succeeded, please remove the SDCard’, remove the TF card from the device, the device will automatically reboot and enter the system.

OBDSTAR-could-not-connect-iPhone-hotspot-and-wifi-solution-19

5. Firmware upgrade is completed.

OBDSTAR-could-not-connect-iPhone-hotspot-and-wifi-solution-20

6. Check current firmware version.

OBDSTAR-could-not-connect-iPhone-hotspot-and-wifi-solution-21

Got o Settings- About- Build number is the current firmware version.

Okay, guys. Try to connect through iPhone Hotspot or Wifi to obdstar X300 DP Plus / odomaster / x300 pro4 (key master 5), it will be working.

2021年12月18日星期六

How to Install JCB ServiceMaster 4 on Win7/Win10

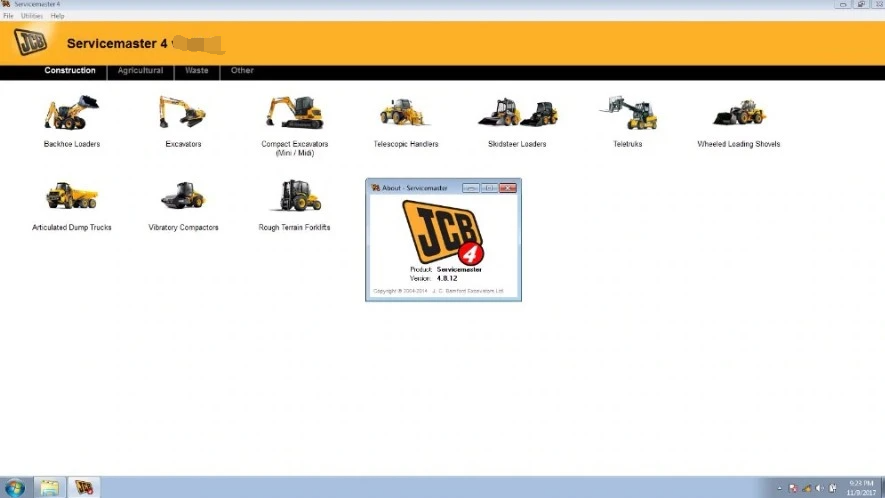
 What is JCB ServiceMaster 4?

JCB ServiceMaster 4 is diagnostic software, which contains complete information for diagnostics and calibration of agricultural machinery and engines company JCB.Setting a diagnostic program JCB ServiceMaster 4 on personal computer users have access to view a variety of information, including information that is stored on one DVD.

JCB Service Master 4 Support Language:
English, Italian, German, French

JCB ServiceMaster 4 Functions List:
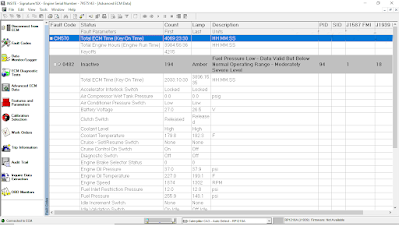
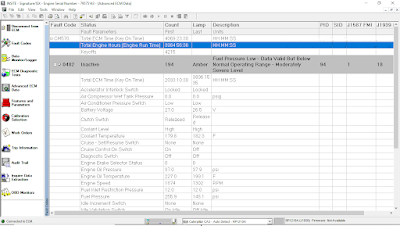
– Troubleshooting;
– Standard Test service;
– View and edit generated data;
– ECU Flash files with the correct data

JCB ServiceMaster 4 Support Constructions & Agricultural:
Construction:
Backhoe Loaders
Compact Backhoe Loaders
Excavators
Compact Excavators (Mini / Midi)
Telescopic Handlers (2007-, 2007+, Tier4, 525-60 Compacr Loadall)
Skid Steer Loaders (Robot, Skid Steer Loaders and Compacr Track Loaders, Skid Steer Loaders India)
Teletruk (Tier4)
Wheeled Loading Shovels (Compact, Medium, Large, Telemasters)
Articulated Dump Trucks
Vibratory Compactors (Tier3, Interim Tier4, VMT380/430)
Rough Terrain Forklifts (Tier2/3 RTFL, Tier4 RTFL)

Agricultural:
Fastrac Tractors (2000-3000, 3000 Series 2, 3000 Series 3, 3000 Series 4, 4000 Series, 7000 Series, 8250 Series 1, 8250 Series 2, 8000 Series 3)
Telescopic Handlers (2007-, 2007+, Tier4, 525-60 Compacr Loadall)
Wheeled Loading Shovels (Compact, Medium, Large, Telemasters)

Waste:
Telescopic Handlers (Tier3, Tier4)
Wheeled Loading Shovels (427/437/435S T4F, 457 T4F)

Other:
JS Range, JZ70, Backhoe Loader, Loadall 2007-, Loadall 2007+, Loadall Agri Extras, Loadall Construction extras, Robot, Teletruk, Midi Excavator 801-8065, 8080-8085, Dump Truck, Large Wheel Loading Shovels, Compact Wheel Loading Shovels, Fastrac 2000-3000 Series, Fastrac 3000 Series 2, Fastrac 8250 Series 1, Fastrac 8250 Series 2, Fastrac 7000 Series 1, Vibromax, JCB Dieselmax Engine, JCB Engine (IPU OEM), JCB Engine (Base Engine OEM), JCB Generators, LiveLink I, LiveLink II.

JCB ServiceMaser 4 Requirements:
Windows XP 32 bit, Windows 7 32 bit, Wnidows 7 64 bit, Windows 8/8.1 32 bit, Windows 8/8.1 64 bit, Windows 10 32 bit, Windows 10 64 bit
– CPU: Pentium/Athlon 2 GHz or higher
– RAM: 512 MB of system memory
– Hard Drive: 25 GB of available space
– Optical Drive: DVD-ROM

How to Install JCB ServiceMaster 4 on Win7/Win10

Procedures:

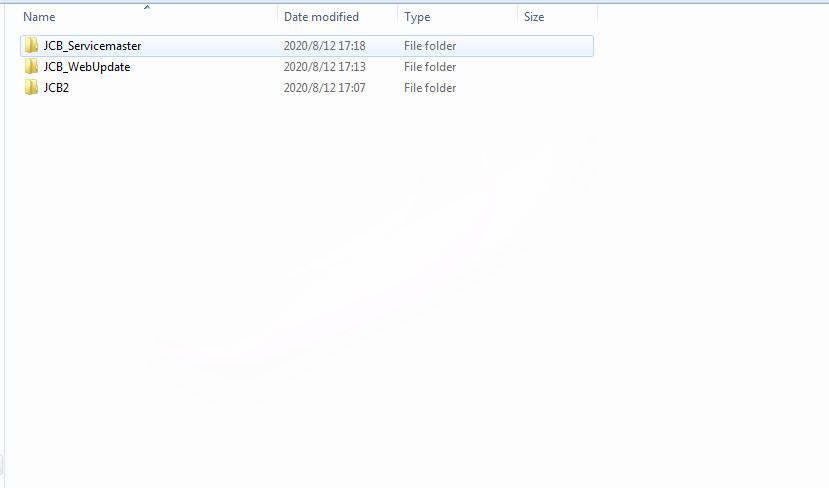
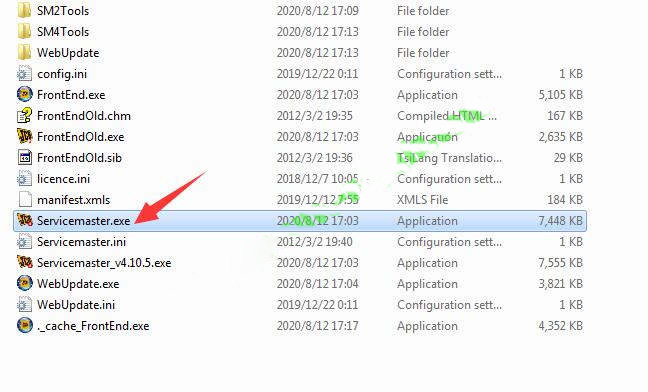
After downloading and extracting you will get below JCB ServiceMaster 4 installation files.

How-to-Install-JCB-ServiceMaster-4-on-Win7-Win10-0 How-to-Install-JCB-ServiceMaster-4-on-Win7-Win10-1

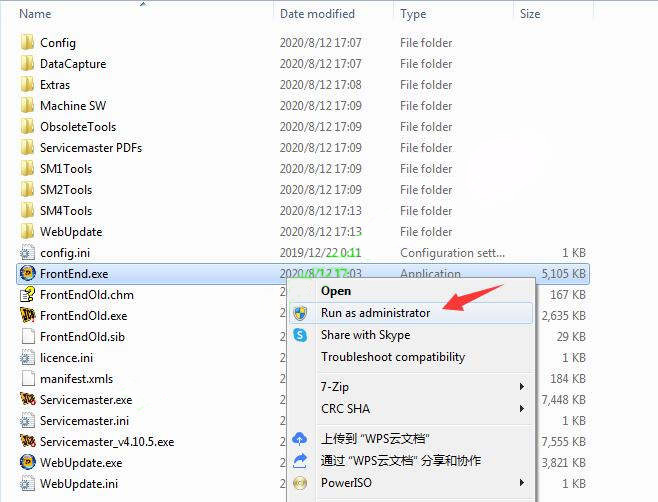
Open “JCB_Servicemaster” folder,then right click “FrontEnd.exe” to run it as administrator

How-to-Install-JCB-ServiceMaster-4-on-Win7-Win10-2

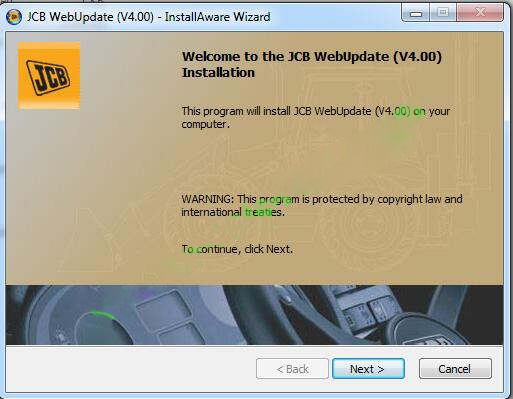
This program will install JCB WebUpdate(V4.00) on your computer,click “Next”

How-to-Install-JCB-ServiceMaster-4-on-Win7-Win10-3

Please wait while WebUpdate (v4.00) is installed.This may take several minutes.

How-to-Install-JCB-ServiceMaster-4-on-Win7-Win10-4

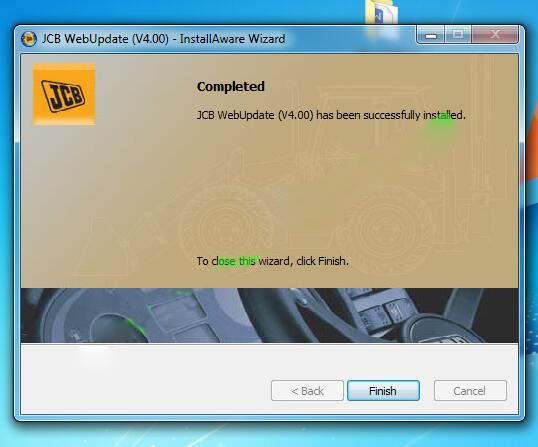
JCB WebUpdate(v4.00) has been successfully installed,click “Finish”

How-to-Install-JCB-ServiceMaster-4-on-Win7-Win10-5

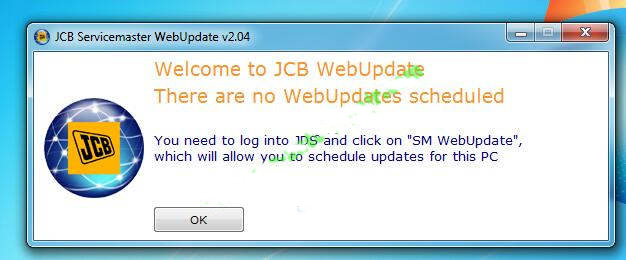
After then it will show you a welcome to JCB message,just click “OK”

How-to-Install-JCB-ServiceMaster-4-on-Win7-Win10-6

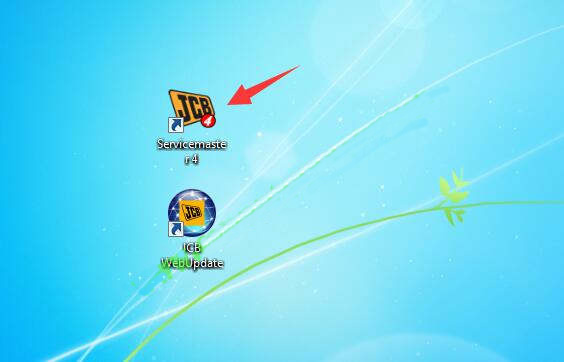
Now back to your desktop,delete the Servicemaster4 shortcut

How-to-Install-JCB-ServiceMaster-4-on-Win7-Win10-7

Then back to “JCB_Servicemaster” folder to select “Servicemaster.exe” and sent it to desktop as shortcut.

How-to-Install-JCB-ServiceMaster-4-on-Win7-Win10-8

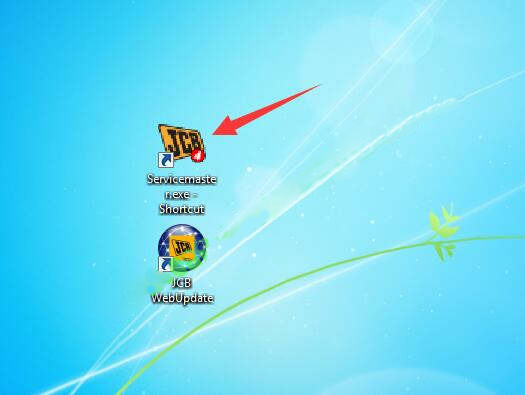
Now run “Servicemaster.exe – Shortcut” on desktop as administrator.

How-to-Install-JCB-ServiceMaster-4-on-Win7-Win10-9

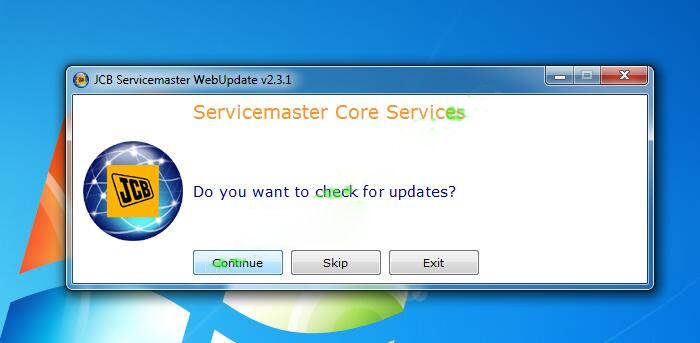
It will ask you to check update,click “Skip”

How-to-Install-JCB-ServiceMaster-4-on-Win7-Win10-10

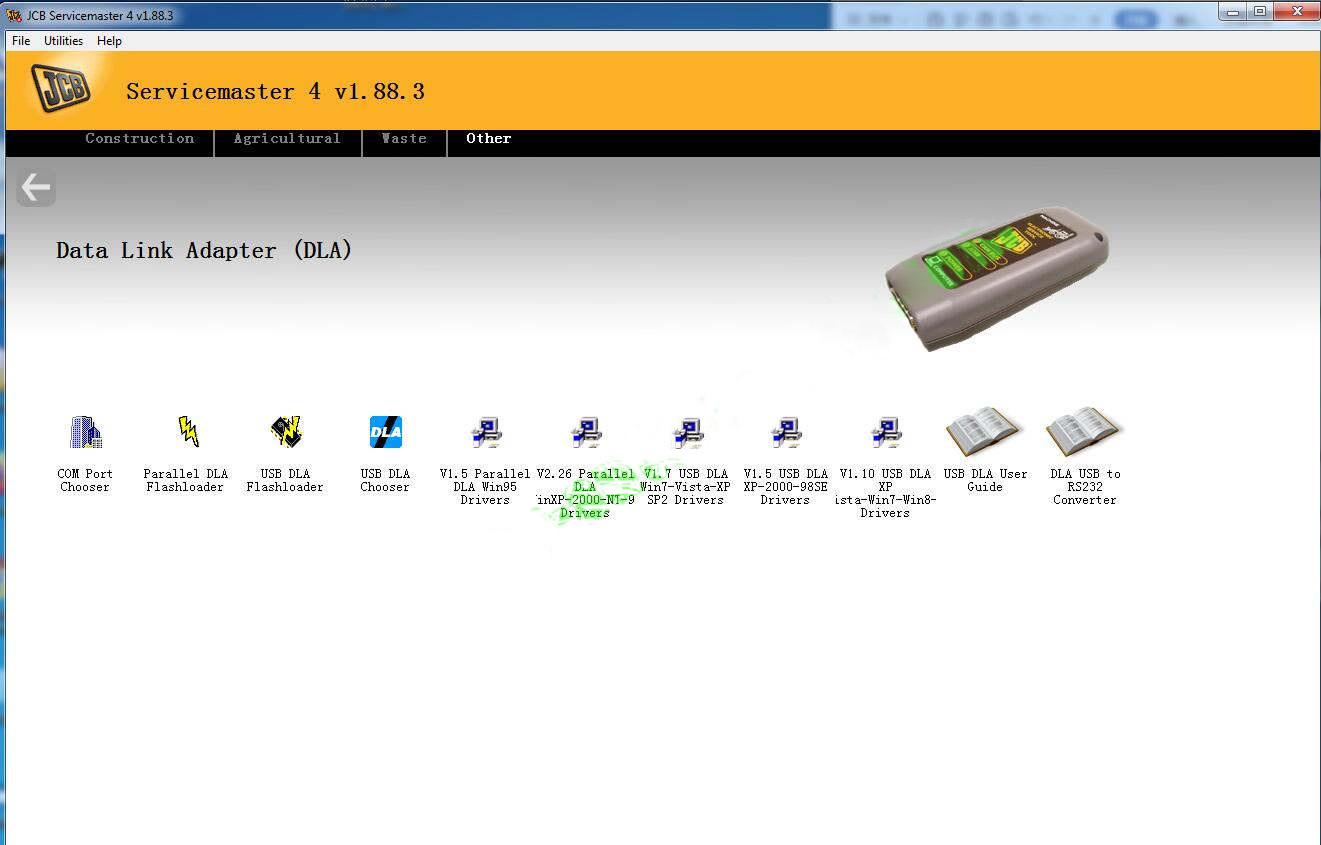
For first time running,it will ask to your update DLA driver

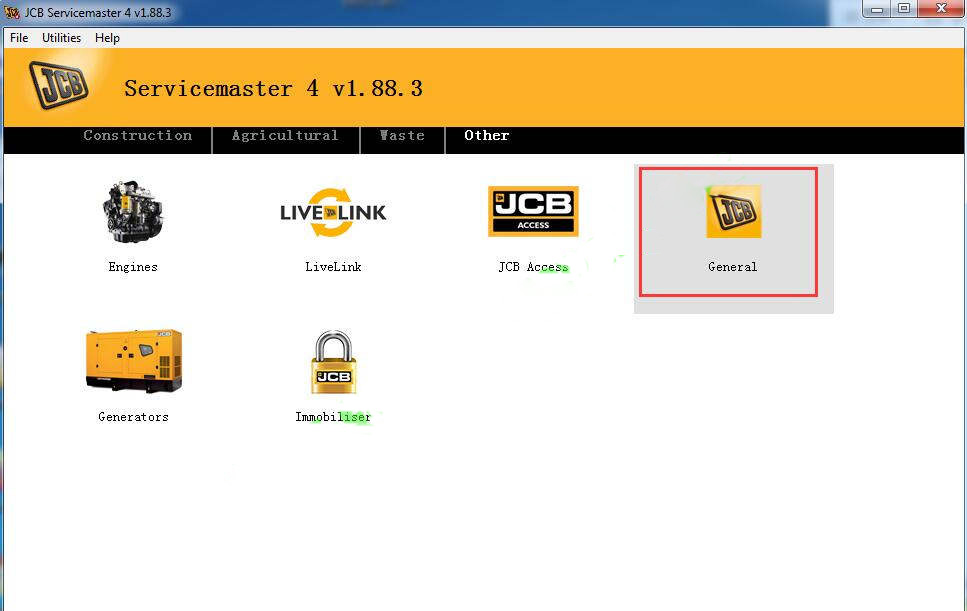
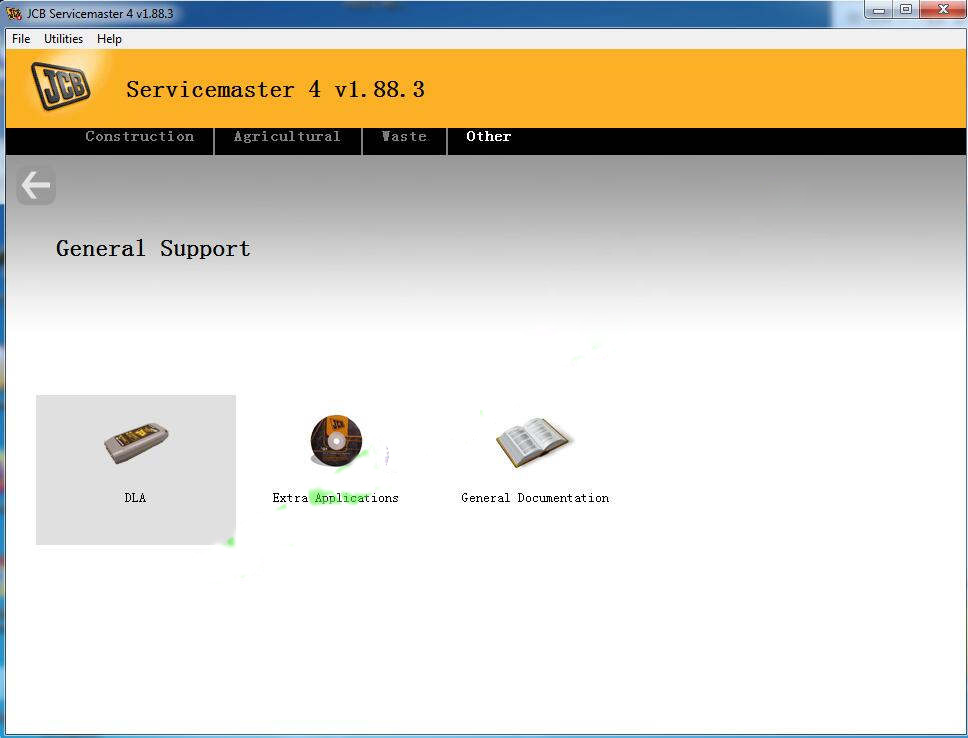
Go “Other”–>”General”–>”DLA”

Please update driver you need

How-to-Install-JCB-ServiceMaster-4-on-Win7-Win10-11
How-to-Install-JCB-ServiceMaster-4-on-Win7-Win10-12
How-to-Install-JCB-ServiceMaster-4-on-Win7-Win10-13

Done!